
The Cass Art Craft Activity Bucket: 5 Ideas for Keeping the Kids Creative at Home
Posted by Cass Art on 18th Feb 2021
Colourful sailing ships, creative bookmarks and lively aquariums – just some of the easy How-Tos you and the kids can enjoy with our Cass Art Craft Activity Bucket. From tissue paper to multi-coloured card, stickers to pipe cleaners, delve into our craft bucket and discover everything you need to get crafting.
We've come up with 5 step-by-step guides to help get you started!
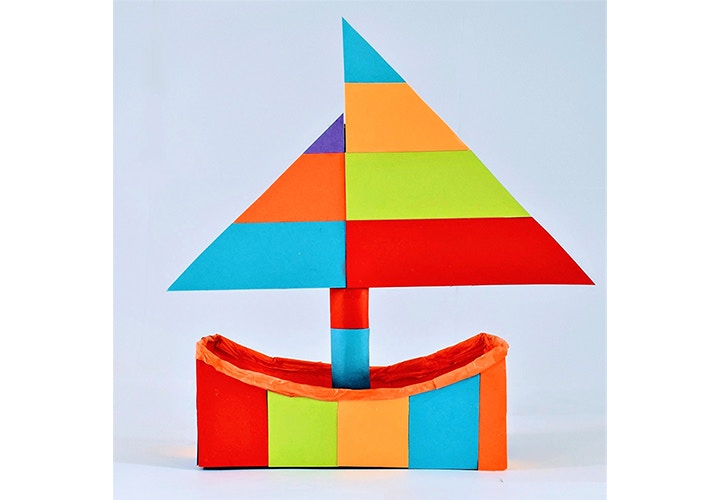
1. RAINBOW SAILING SHIP
This multi-coloured sailing ship will feed the kid’s imagination and have them dreaming of oceans afar. Feel free to choose your own colour combinations and personalise!
What you need:
From the Cass Art Activity Bucket:
- Orange tissue paper
- Orange paper squares
- Multi-coloured card (orange, red, yellow, green, blue, purple)
- Scissors
Additional:
- Cereal box
- Kitchen roll cardboard tube
- PVA glue
- Paintbrush
- Sticky tape
- Marker Pen
Step 1.
Gather your materials. Cut out a boat-basin shape from the bottom of the cereal box. It's a good idea to mark out the cut-out line on the cereal box before you cut into it. With the remaining part of the cereal box, cut out two triangles for the boat sails.
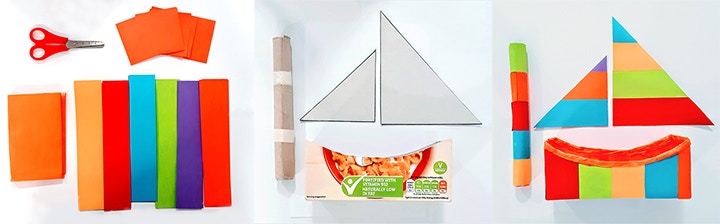
Step 2.
Cut a straight vertical line from the top to the bottom of the kitchen roll tube. Overlap the tube edges so the tube width becomes smaller. Secure in place with masking tape or Sellotape. This will be the boat’s mast.
Step 3:
Now it’s time to decorate your ship. Using PVA glue and a paint brush, stick your strips of coloured card to your boat basin, sails and mast. Stick your orange paper squares to the inside of the boat and the orange tissue paper to the rim (don’t worry about folding and crumpling the tissue paper here). Allow a couple of hours for the PVA glue to dry.
Step 4:
Stick your boat parts (mast, sails, basin) together using PVA glue. Allow a couple of hours for the glue to dry.
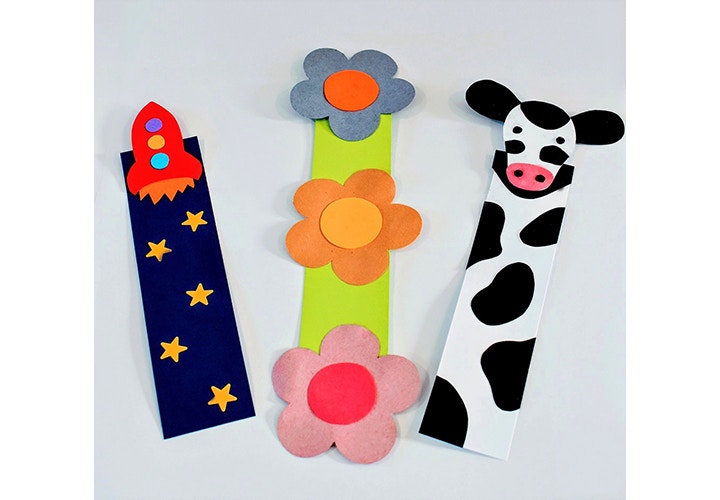
2. CREATIVE BOOKMARKS
Add a splash of colour to reading time with these creative bookmarks. You could even inspiration from the book you’re reading!
What you need:
From the Cass Art Activity Bucket:
- Multi-coloured card
- Star stickers
- Flower shaped paper
- Scissors
Additional:
- PVA glue
Step 1.
Gather your materials. Cut out your bookmark shapes. We’re cutting out shapes for flower, rocket and cow themed bookmarks, but you can choose your own designs if you wish!
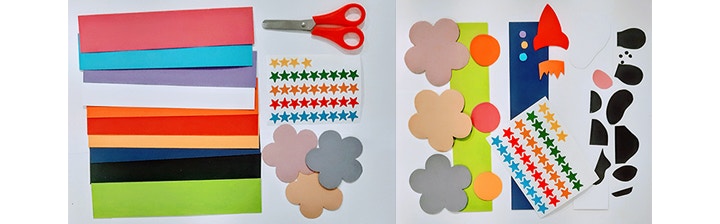
Step 2.
Stick your cut-out shapes onto the coloured card strips. Leave for a couple of hours to dry.
3. PERSONALISED DOOR SIGN
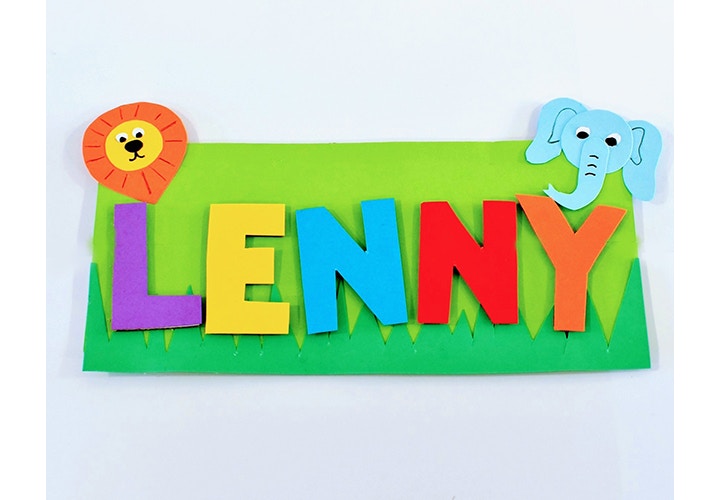
Make sure everyone knows it’s YOUR room, with this colourful personalised door sign. We’ve used a jungle theme, but you can adapt to whatever theme you like. From dogs to dinosaurs, fairytales to spaceships!
What you need:
From the Cass Art Craft Activity Bucket:
- Orange tissue paper
- Orange paper squares
- Multi-coloured card – orange, red, yellow, green, blue, purple
- Scissors
Additional:
- Cereal box
- Kitchen roll cardboard tube
- PVA glue
- Paint brush
- Masking tape or Sellotape
- Marker pen
- Paint brush
- Black marker pen
Step 1.
Gather your materials. Cut out a 25 x 10cm rectangle from your piece of cardboard. Then cut out the letters in your name (it’s a good idea to first draw out the letters on the cardboard using a pen before you cut them out).
Step 2.
Using the cardboard letters as a guide, draw your name letters onto the multi-coloured strips of card. Cut out the coloured letters and stick them to the cardboard letters.

Step 3.
Take the multi-coloured strips of card and cut out the shapes for your door sign decorations. We’ve cut out a spiky strip for the jungle grass, yellow and orange shapes for the lion, light blue shapes for the elephant and small white circles for the animals’ eyes and added extra details using the black marker.
Step 4.
Using PVA glue, stick two strips of coloured card to the 25 x 10 piece of cardboard. The stick down the letters and door sign decorations and leave for a couple of hours to dry.
4. AQUARIUM
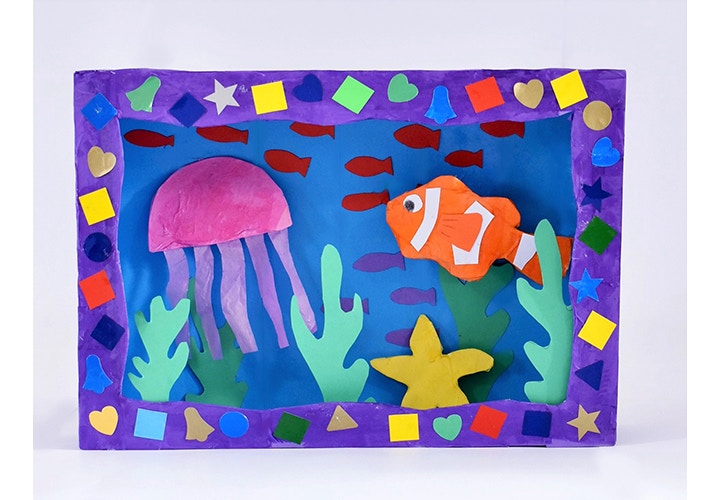
Pink jellyfish, swirling seaweed and a spritely starfish – it can only be our crafty aquarium. Almost everything you need to make this aquarium can be found in the Cass Art Craft Activity Bucket. You just need an old cereal box, some PVA glue and a paintbrush.
What you need:
From the Cass Art Craft Activity Bucket:
- Purple, pink, yellow and orange tissue paper
- Multi-coloured card – blue, green, orange, red, purple, white
- Assorted coloured gummed shapes
- Scissors
Additional:
- A cereal box
- PVA glue
- Paint brush
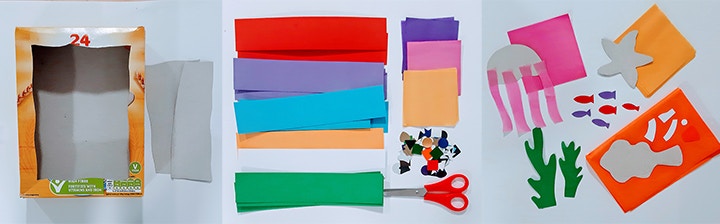
Step 1.
Gather your materials. Cut out a 30 x 15cm rectangle from the front of your cereal box.
Step 2.
Cut out various sea-life shapes from the rectangle you’ve just cut from the cereal box. We’re including a jelly-fish, a clownfish, a star fish and some miniature fish. We’ve also cut some plant life shapes from the green strips of card.
Step 3.
Using PVA glue, cover the jelly-fish, clownfish, star fish with coloured tissue paper and allow a few hours to dry.
Step 4.
Now it’s time to decorate your cereal box. Using PVA glue stick the purple tissue paper to the outside and the blue coloured card to the inside of the box. Stick down your mini fish, clownfish and jellyfish to the blue background, and green plants and starfish to the bottom. Finally stick the multi-coloured gummed shapes to the outside frame.
5. RAINBOW WALL HANGING
Everyone loves a rainbow! Hang this in your home or on one of your windows to spread joy to the world outside.

What you need:
From the Cass Art Craft Activity Bucket:
- Red, yellow, green, blue, purple, white and light blue tissue paper
- Scissors
Additional:
- A piece of cardboard
- White string
- PVA glue
- Paint brush
Step 1.
Gather your materials. Cut out 5 rainbow arches, a sun shape and a rain cloud shape from your piece of cardboard.
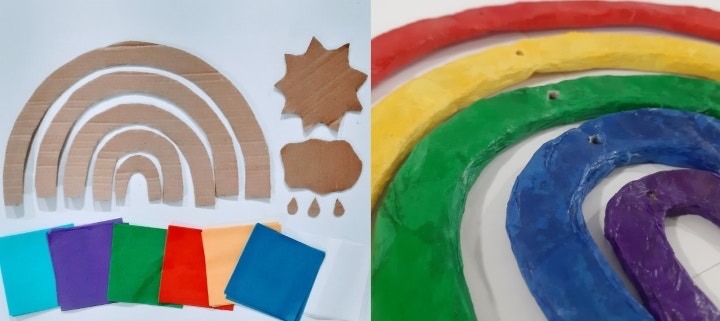
Step 2.
Using PVA glue, cover the rainbow arches, sun and rain cloud with coloured tissue paper and allow a few hours to dry.
Step 3.
Using the tip of a pen, pierce a hole in middle of the rainbow arches, at the bottom of either side of the yellow arch and at the top of the sun and cloud shapes. Pierce three holes across the bottom of the cloud shape and at the top of each of the raindrops.
Step 4.
Finally, attached each rainbow arch together using your white string and link the sun and cloud to the bottom for the yellow arch. Finally, tie string to link the raindrops to the bottom of the cloud.

