
Create your own SoFlat 'Matte Mondrian'! Masterpiece
Posted by Cass Art on 23rd Jun 2021
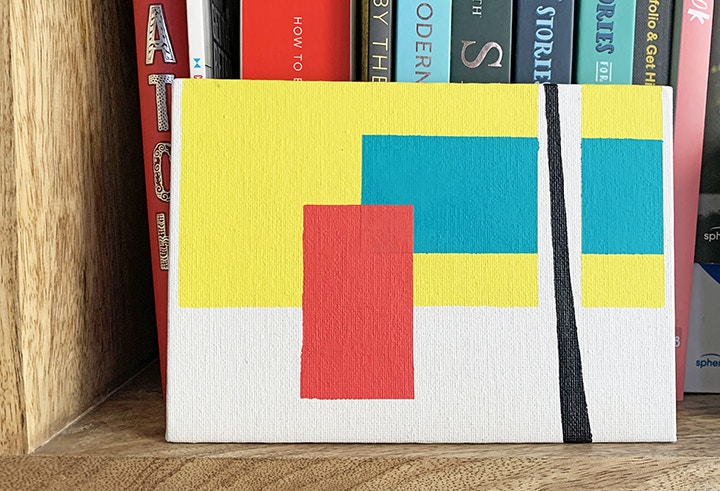
Desperate to try the new SoFlat Matte Acrylics but unsure where to start? Our bright and bold guide will give you the kickstart you need, create your own Mondrian inspired masterpiece and learn how these colours behave together.
The graphic nature of the artwork made for a rather cathartic creative process here. You could freehand the blocks or outline in pencil first but I used masking tape to help me with straight lines.
What You'll Need
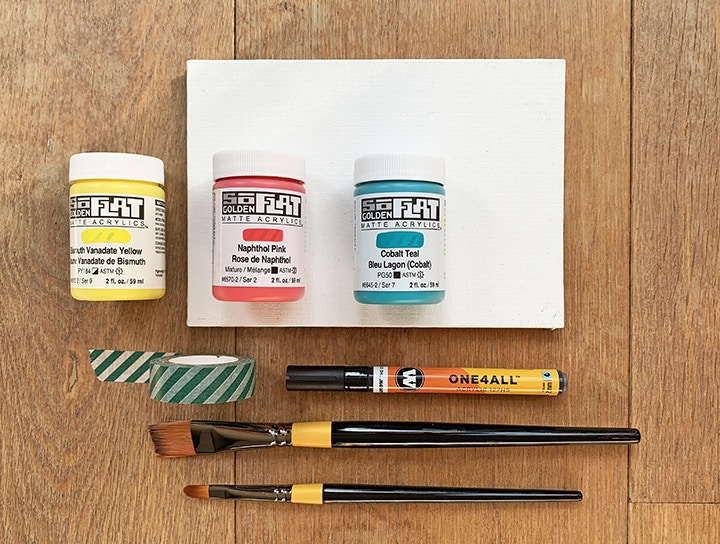
Acrylic paint
I used the new Golden SoFlat Matte Acrylics. As the name suggests, they dry super matte and cover the canvas beautifully. The texture is slightly thicker than high flow so no need to add any water. As my creations are simple I’m going to only using 3 colours (Naphthol Pink, Bismuth Yellow and Cobalt Teal) with black as a highlight.
Canvas or Canvas Board - I used the Cass Art 5x7 boards. They come in a pack or 10 so you can make some for you and send some as gifts!
Selection of brushes - I used Daler Rowney System3 - Filbert 3/4 short flat
Washi tape (I used 15mm wide)
Black Marker pen - I used Molotow One4All Acrylic
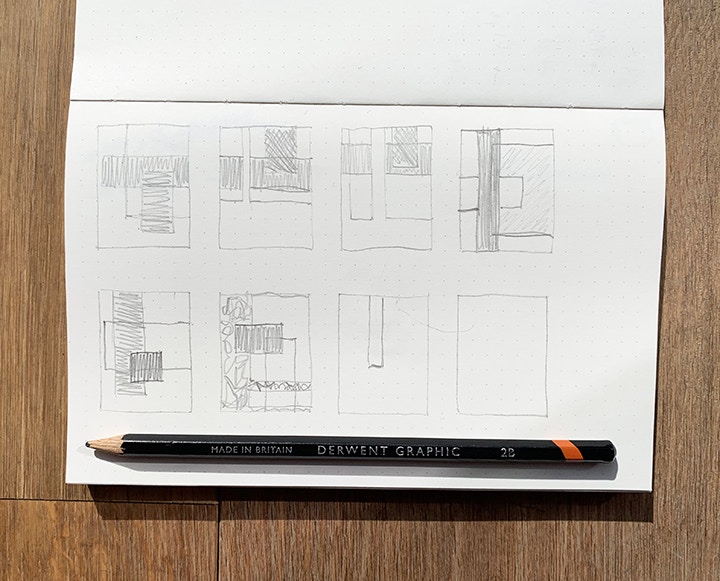
Step 1
Start by drawing out your designs to see what you like. Restrict yourself to 3 squares/rectangles and play around with white (negative space) to break up the colours. Take time to look at if the shapes intersect or not, sketching them out first lets you play around. You could do this on a computer if you prefer but I like to use this as time away from the screen.
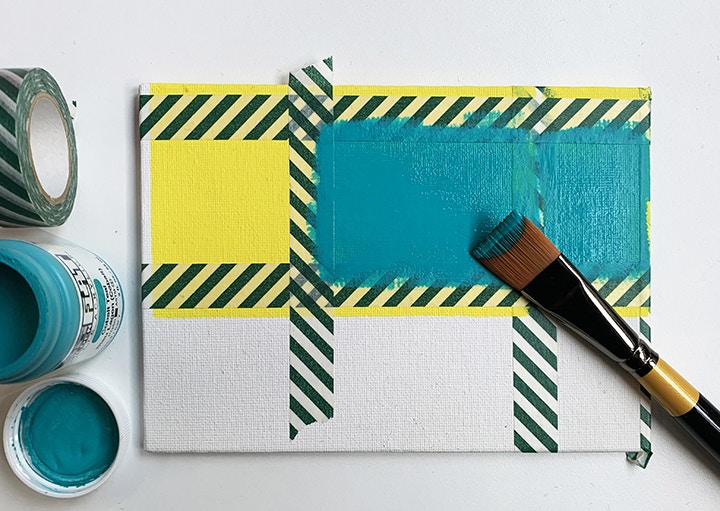
Step 2
Once you have your design then mask out the bottom layer. Paint in a thin layer your first colour. Wait for it to dry and re-apply to get a more solid finish. Make a cuppa and wait for it to dry again. Check your design and remove the masking tape that you no longer need.

Step 3
Mask your 2nd layer and paint in you next colour. One this is dry you can decide to add another coat if you want it to cover the colour underneath or leave it show through. Check your design and remove the masking tape that you no longer need.
Step 4
Repeat the above for your third and final layer.
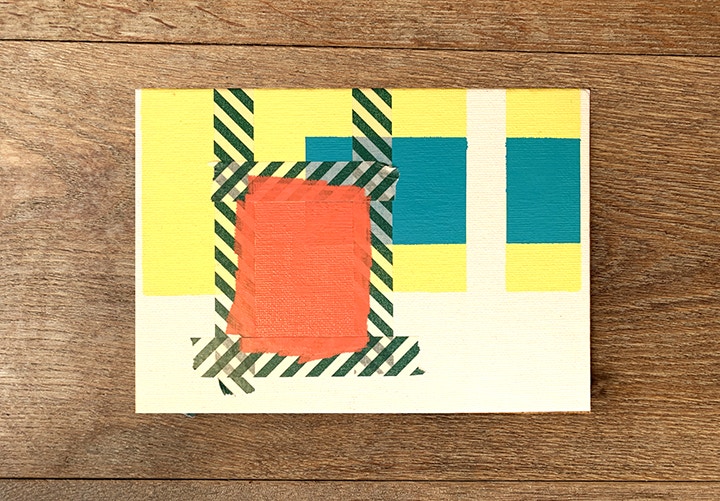
Step 5
Add in a contrasting black line to add interest or offset the colours. I did mine with a marker pen but you could mask and paint in as well if you prefer. Depending on your design you could leave this step out completely or use it to outline your colour blocks – see what inspires you most!

And that's it!
Feeling Inspired?
Shop the Golden Collection online today

