
DRAW - How to Draw a Self Portrait in Profile
Posted by Draw Brighton on 3rd Apr 2020
Self portraits are a staple of learning to draw. Not only is it a challenge to capture one's own likeness, as long as you have a mirror, you are also guaranteed a subject! It is an accessible way to get practise with portraiture. Self portraits can sometimes feel like a mundane subject, and often our efforts aren't very imaginative, as we may feel limited by this view.

How to Set Up
- Place your first mirror in front of you at head height, angled out a little bit towards the second mirror.
- The second mirror should be propped up at head height at your side, slightly behind you, at an angle that faces between the first mirror and your face.
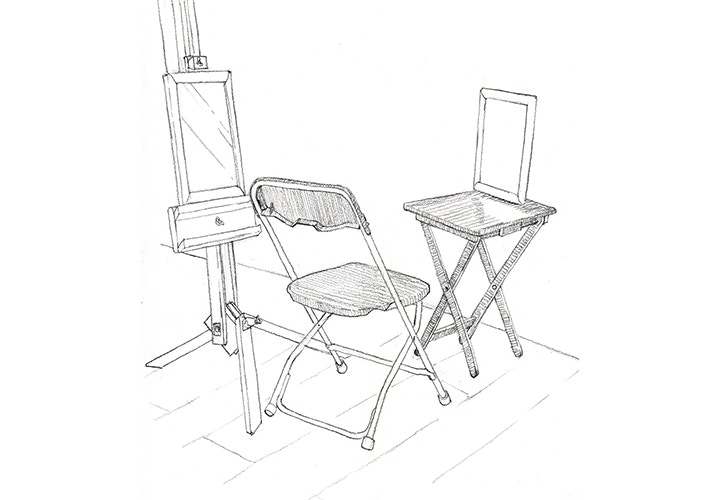
This is my set up for the demonstration below. I used an easel for my second mirror, but any arrangement of furniture and books would work.
You can experiment with the placement of the mirrors. By adjusting the side mirror, you can get unusual oblique angles, or even approach some ¾ views as more of the face comes into view. You can also use this technique to do some hair studies.
Another trickier option is to try out elevated angles by raising or lowering your side mirror - just keep it tilted towards your head. If you raise the mirror and point it down slightly, you will get a view from above, whilst lowering the mirror and pointing it up will show a view from below.
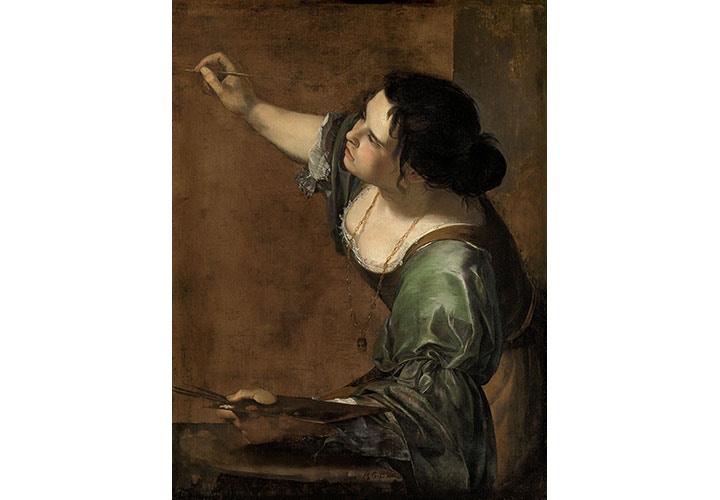
Artemisia Gentileschi - 'Self-portrait as the Allegory of Painting' It is possible that Gentileschi used two mirrors to help her capture her face and pose for this complex self portrait – of course, cameras were not an option 400 years ago! It is possible to get a similar angle of your own head by elevating the second mirror.
Tips for Drawing the Portrait in Profile
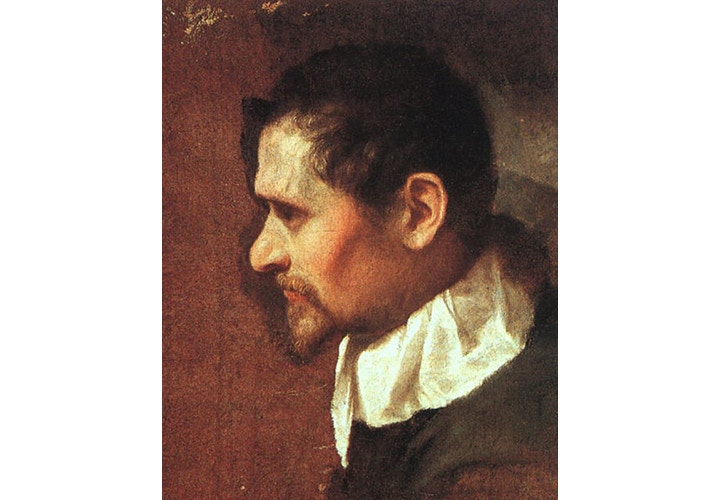
As the head turns, the features are going to be confined to the front of head. Hold your finger up to the illustration below, and you will probably find it covers the features.
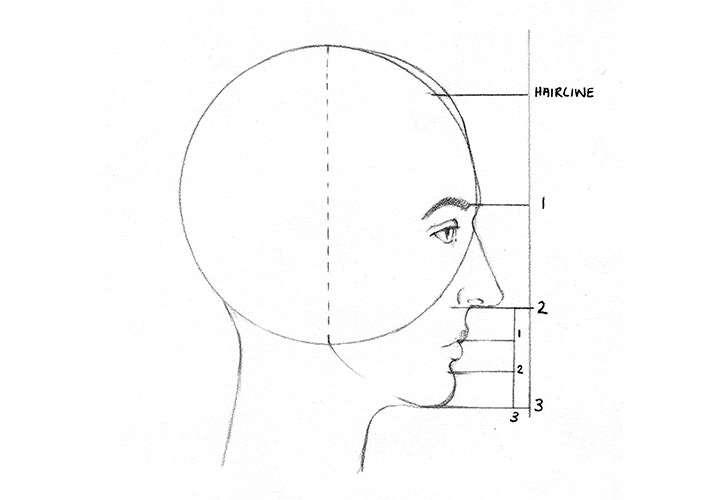
Proportions of the features. Proportions vary a bit from person to person, but they are a useful way to check for errors.
I tend start by locating the hairline, or the eyebrows if I cannot see the hairline. Using this as an anchor, I break the face into thirds, either working down from the hairline, or out from the eyebrow. (To do this, divide the face below the eyebrow in half, then transfer a half above the eyebrow to create an imaginary hair line.)
These third markers correspond to :
- Hairline
- Eyebrow line
- Base of the nose
- Bottom of the chin
... plus a bit of space on top for the hair.
To place the lips, I tend split the gap between the nose and the chin into thirds again, putting the mouth line on the top third marker. The lower lip is very variable from person to person, but the chin tends to fit in the bottom third.
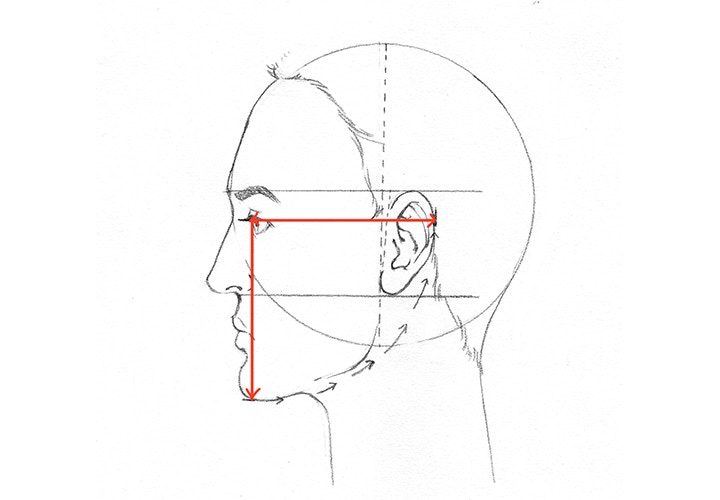
The distance from the front corner of the eye to the chin is roughly the same as the front corner of the eye to the back of the eye (shown in red).
A common issue in profile portraits is the ear being placed too close to the other features - there is a reasonable amount of space between the ear and the front of the face.
If you take the distance from the front corner of the eye to the bottom of the chin, and rotate it 90°, this marks where the back of the ear is. The front is approximately halfway across the head.
Once you know how far back the ear goes, it can then be lined up between the eyebrow and base of the nose. Ears can be variable in shape and size, so you may find it is larger or smaller than this space.
Over to You
It goes without saying that your challenge now is to produce a self portrait, in profile. Make sure you get everything you need, set up your work area and get settled in.
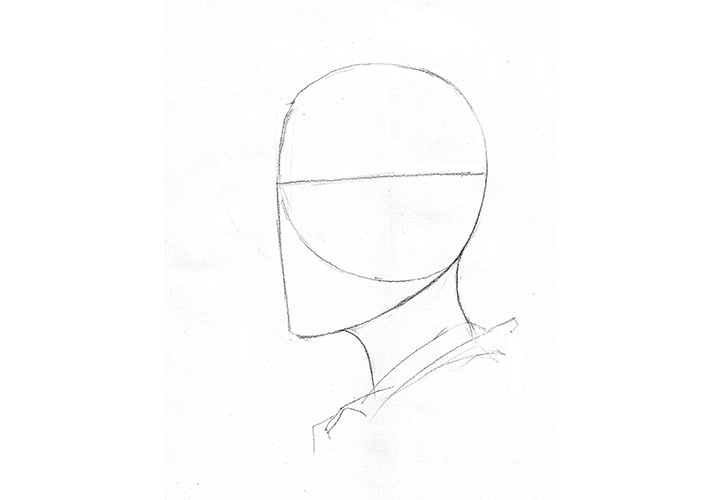 STEP 1
Start by laying in the major structures of the head – I like to reduce it to a ball and wedge for the jaw. The line across the head indicates the tilt.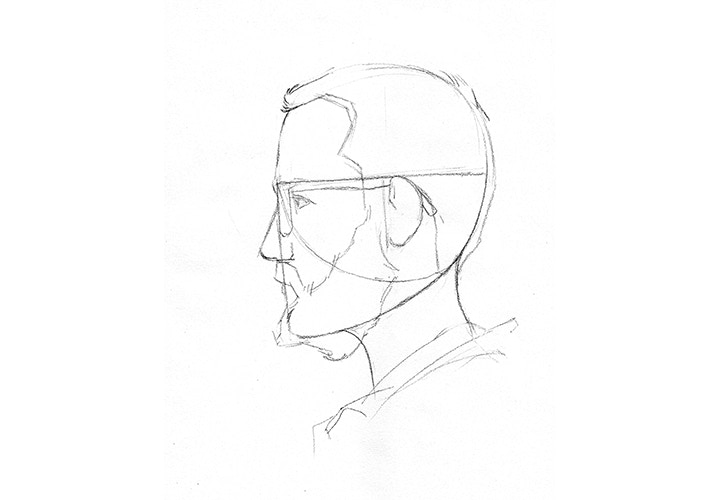
STEP 2
Place markers for the features and hairline, and block in their approximate shapes. Check your proportions and work over the whole head – hold off details for now.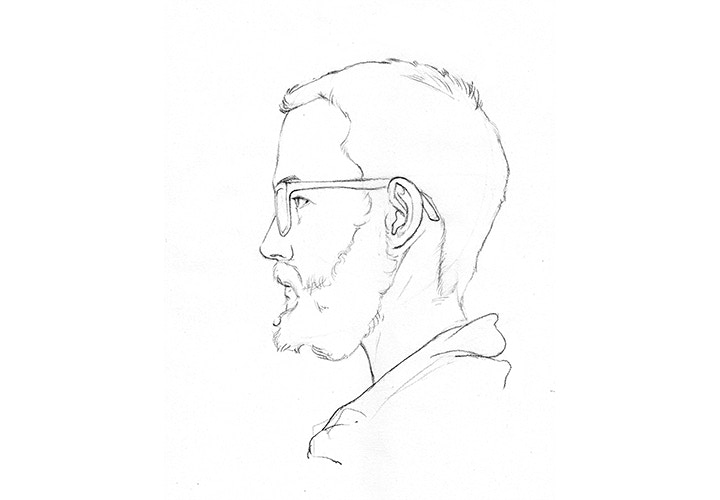
STEP 3
Start to define the outline of the face. The contour is important in the profile view, because the features – especially eyebrows, nose and lips – create much of the detail in the silhouette.
STEP 4
Here I've added detail and tone. This is where your own decisions can take over; you might want to keep it at a simple contour drawing, or you can work up more tone and detail.
Please share your drawings with us, we would love to see what everyone is up to! Tag us with @Draw_Brighton or #DrawBrighton
These articles have been commissioned by Draw using the Draw Patreon, set up to provide tutors and life models at Draw with ongoing work during the cover-19 pandemic. Supporters to the Patreon receive regular life drawing and portrait refernce to draw from alongside weekly drawing articles on drawing from home.
Feeling Inspired?

