How To: Ultimate Tie Dye Tips & Techniques with Tulip and Dylon
Posted by Cass Art on 16th Jun 2018
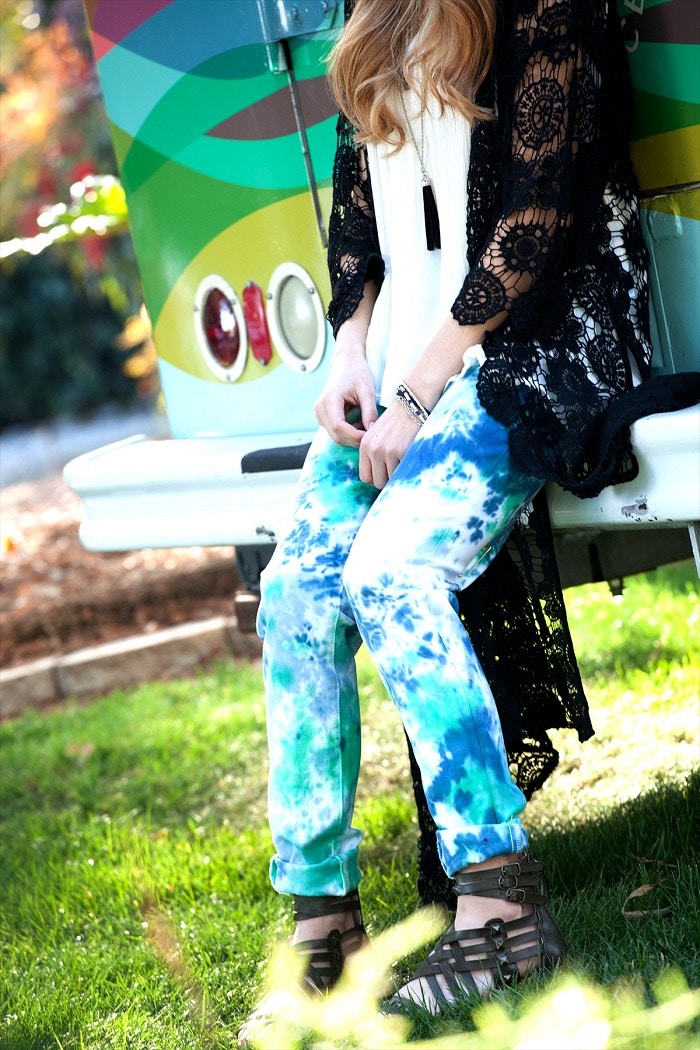
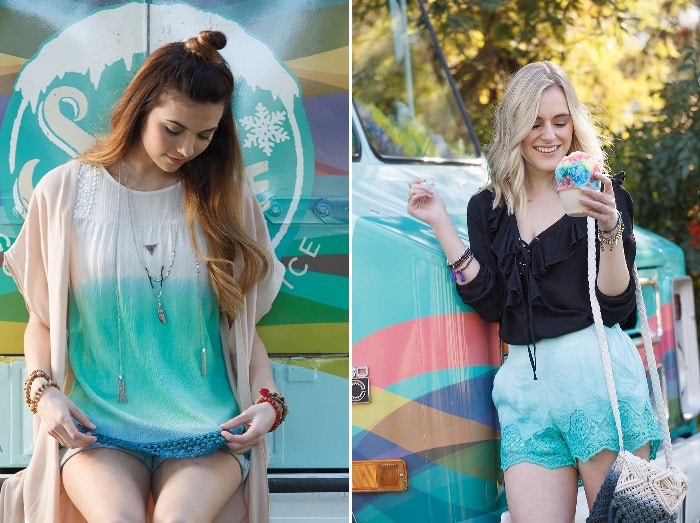
Hitting the London Fashion Week catwalk, the Maruques' Almeida collection rocked a 1990s retro look, featuring waves of tie-dyed material in slip dresses and oversized gingham shirts.
Whether you twist it, dip it or tie it - Tie-Dye is the perfect technique to inject some energy into your everyday items. Learn how to create Galaxy, Spider and Heart Shaped patterns with our step-by-step guides to creating your patterns at home.
Preparing Your Material
Whatever technique you’re looking to try out, it all starts with these three simple steps:
Step 1
Ensure the fabric is fit for purpose. The best materials for Tie Dying are natural fabrics as these absorb the pigment and keep their colour strength when washed. Cotton, linen, wool and silk are the perfect materials for trying out your Tie Dye techniques.
Synthetic materials do not dye well and often lose their colour strength over time. Steer clear of Polyester, nylon and spandex.
Step 2
Make sure your work space is ready to go. Cover a large surface with a plastic protective sheet and/or newspaper to ensure your dye doesn’t transform your table tops or carpets. Have all your materials ready and on hand, as once your gloves are on, it can be tricky to untie elastic bands or remove lids.
Top Tip: If the weather permits, we would suggest tie dying outside to keep splashes and spillages to a minimum.
Step 3
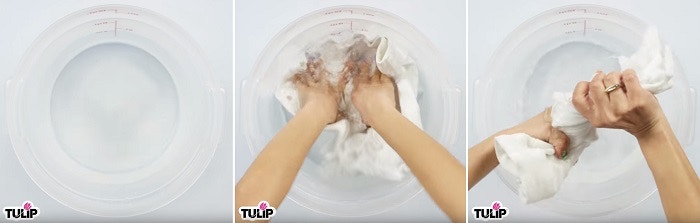
Prepare your fabric. Remove anything you do not wish to dye - this could be tags, badges, strings or laces. Using a large bowl, submerge your fabric so that it is completely soaked through with water. Squeeze the excess water out and straighten your fabric back to its original shape. This will allow the dye to spread and blend easily.
You’re ready to go!
We’ve put together some of our favourite techniques to inspire your creations.
How To: Heart Tie Dye
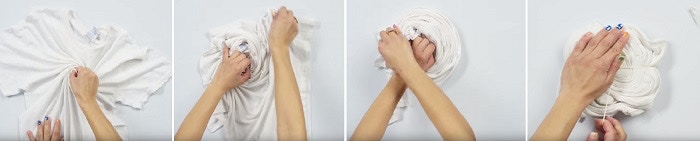
Fold your t-shirt in half and mark out half a heart shape using a water soluble marker.
Pinch the material along the line, in a concertina affect. This will prevent the dye from taking and outline your heart shape. Using elastic bands (or string) fix the pinched fabric in place so that it is tight and will not unravel.

Apply your concentrated dye, mixing and layering the colours for your design. Remember to cover both the front and back!
Seal your fabric in a plastic bag and allow the dye time to develop.
Wash your fabric, either via hand or machine, and leave to dry. Make sure that this is washed separately; otherwise you are in danger of multi-coloured laundry fiasco.
How To: Spider Tie Dye
Fold your t-shirt in half and pinch slightly above the centre with your fingers.
Twist the material into a spiral, ensuring the fabric stays flat on your surface. Using elastic bands (or string) fix the pinched fabric in place so that it is tight and will not unravel.

Apply your concentrated dye, mixing and layering the colours for your design. On one side, cover your fabric with colour, a mixture of brights always works well. Flip the fabric over and cover the reverse in black dye. This is what will define your pattern.
Seal your fabric in a plastic bag and allow the dye time to develop.
Wash your fabric, either via hand or machine, and leave to dry. Make sure that this is washed separately; otherwise you are in danger of multi-coloured laundry fiasco.
How To: Galaxy Tie Dye
Starting at the bottom corner of your fabric, start to pinch and twist the fabric randomly, securing with an elastic band after each new fold.
Twist the material until the entire fabric is twisted and folded. Add more elastic bands randomly to keep everything in place, and add more effects to the design.

Apply your concentrated dye, mixing and layering the colours for your design. Using dark colours such as purple, blue and black with one bright, such as a yellow or pink, really brings the galaxy technique to life.
Seal your fabric in a plastic bag and allow the dye time to develop.
Wash your fabric, either via hand or machine, and leave to dry. Make sure that this is washed separately; otherwise you are in danger of multi-coloured laundry fiasco.
How To: Spiral Tie Dye
Lay your fabric out on a flat surface. Pinch the centre and twist the fabric anticlockwise.
Continue twisting the fabric in an anticlockwise direction, ensuring the fabric stays flat and the twists are even. Keep twisting until the fabric circular in shape with a clear spiral emerging.
Using elastic bands (or string) fix the twisted fabric in place so that it is tight and will not unravel.
Apply your concentrated dye, mixing and layering the colours for your design. Remember to cover both the front and back!
Seal your fabric in a plastic bag and allow the dye time to develop.
Wash your fabric, either via hand or machine, and leave to dry. Make sure that this is washed separately; otherwise you are in danger of multi-coloured laundry fiasco.Feeling Inspired?
Find everything you need to experiment with tie-dying in-store and online with our range of Tulip and Dylon products.
Learn how to customise your trainers with Tulip with our How To Guide
Share your Tie Dye creations with us on our social media channels.