
How to Photograph your Artwork
Posted by Cass Art on 24th Sep 2020
Artfinder sells art that changes lives! Art that awakens our imagination, transforms our homes and expresses who we really are. Aare building a world where artists can make a living doing what they love. Where anyone can easily find and buy original art, no matter their taste or budget. Art is for all at the end of the day! We were delighted to speak to the folks at Artfinder for a series of tips and techniques on how best to sell your work online. One of which is of course how to photograph your work.
Taking high quality photographs of your artworks is a hugely important part of successfully selling your pieces online. Without a physical showroom to display your artwork, it is vital that you give your customers the best insight as possible through the images you upload.
Whether or not you have photography experience, there are a few simple things you can do to ensure your images are as faithful as possible to life. Here are some basic tips to help you take photographs of your artworks that will do them justice.
Find the best setting
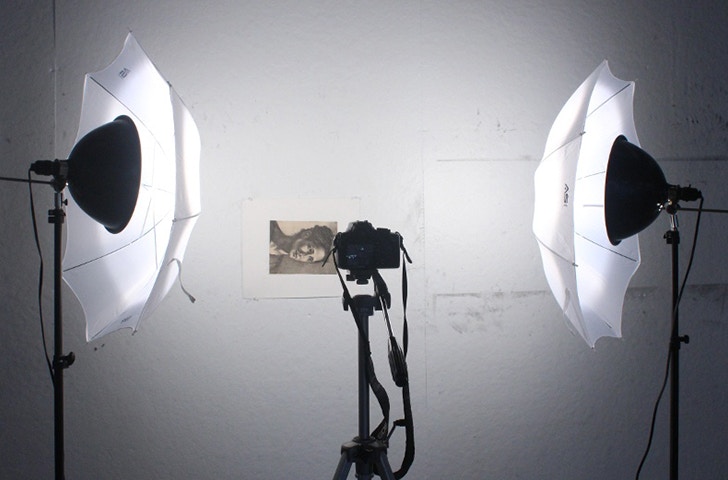
Natural lighting is best - a room with large windows or a spot outside on a slightly overcast day will work well. If you cannot find a space with enough natural light, it is best to use two artificial lamps of the same intensity. These lights should be positioned behind the spot from which you are taking your photographs. To achieve even coverage, each should ideally face the centre of the painting at a 45 degree angle.
Try to find a clean, clear wall or surface against which to hang or lean your artwork to avoid backdrop distractions taking the focus away from your piece.
Camera settings need to be adjusted for the best results.
Set the ISO on your camera low, at between 100-200 depending on the camera you are using. The ISO setting determines how sensitive your camera will be to light- if it is set too high, your images will come out grainy.

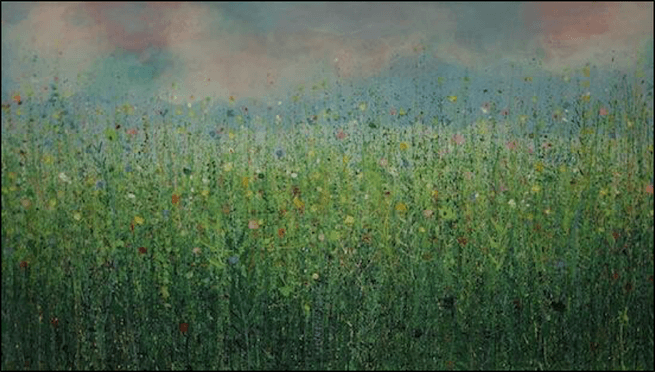
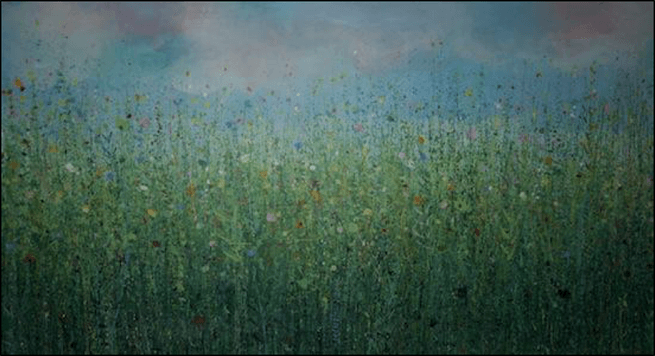
The image above, of Sandy Dooley's painting 'Springer Green', has been taken with a camera set to a high ISO- the colours appear grainy and distorted. A much more accurate representation is given by the photograph below, which was taken with an ISO setting of 100
Be sure to turn off your flash before you start shooting - leaving it on could lead to misleading and washed-out colouring on your images. The below image has been taken with flash in a space with insufficient lighting. This has led to blurring and distortion in the centre, coupled with darkness around the edges of the canvas.
Check for any other settings that may distort from a clear and natural representation of your artwork. If your camera has a date stamp functionality, make sure that it is turned off!
Get Snapping!
Position your camera to avoid movement.
The best way to lessen the chance of your camera moving while you are taking photographs is to use a tripod. If your artwork is tilted, make sure that you angle the tripod so that your camera lens is parallel with the face of your artwork. If you don’t have access to a tripod, you can rest your camera on a flat surface to keep it straight and still.
Movement when you take your photographs will lead to blurry images which will not allow your customers to appreciate the finer details of your work.
The more, the merrier!
Now you should be ready to start shooting your artwork! Take plenty of shots, even if you have already taken one you think would like to use. The more choice you give yourself when you upload the images to your computer, the better.
Don’t just take photographs from one viewpoint or angle. Try to think of what aspects of an artwork you would take a closer look at before committing to buy. If your artwork is an original canvas, take a photograph from the side to indicate depth. If it is framed, be sure to upload a shot where the frame is visible. A close-up of the artwork signature is always a good idea, as well as the edition number if your piece is a limited edition print.
Add the finishing touches
Make necessary adjustments on your computer
You are now ready to upload your artworks to your computer. Once you have transferred the images, take a look through and decide which ones you would like to use for your online listing. You can use some basic photo-editing tools to crop your pictures and remove unwanted background space. The primary image of your artwork on site should be of the artwork canvas or image plate alone.
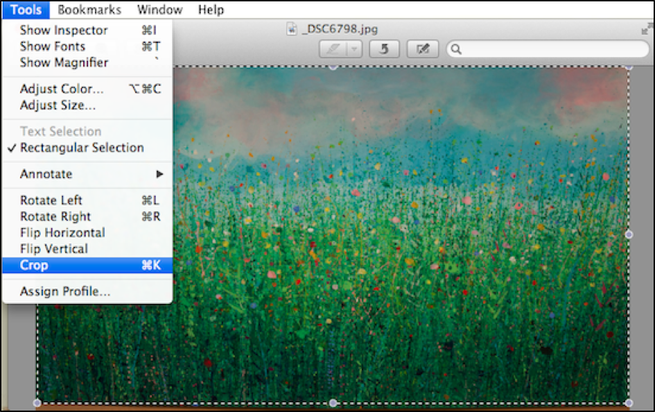
Other tools, such as contrast adjustment, can also sometimes be useful, but be careful not to over-manipulate your photographs, as you want them to remain as true to life as possible. Basic tools to crop images and adjust image contrast can be found on 'Windows Photo Gallery' on Windows or 'Preview' on a Mac. Avoid adding watermarks to your images as we have seen these to significantly reduce the chances of an artwork making a sale.
Upload to Artfinder!
Your artwork is now ready to upload to the Artfinder website!

