Oil painting techniques can initially seem hard to master when you first start painting. There's a learning curve with all types of painting, of course, but oil painting can seem particularly overwhelming. Fortunately, some simple, practical techniques for oil painting can make the transition much smoother, transforming your process and enhancing your oil painting skills.

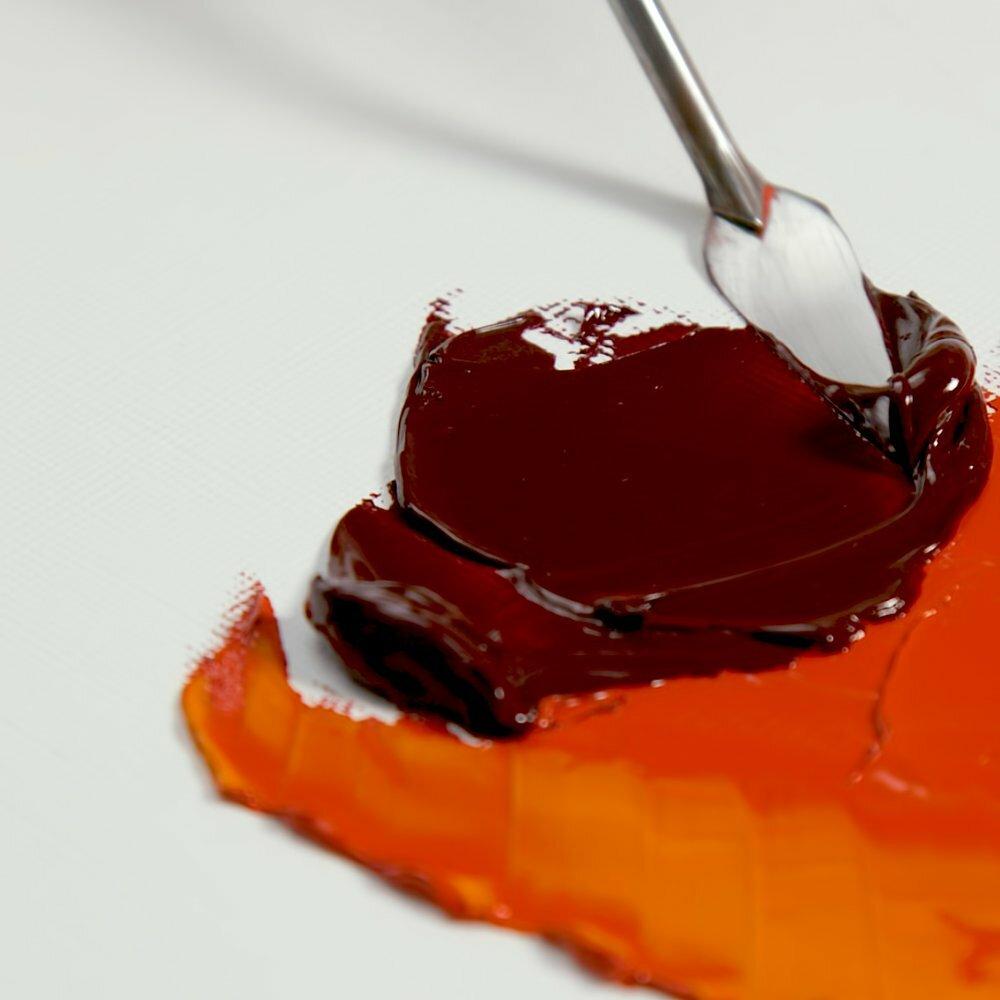
One big advantage of oil paints is that you can build up impasto, which means to paint with thick paint. that can help convey a three-dimensional look. Painting in an impasto-like fashion will hold the mark of either your brush or palette knife. There are a number of ways you can do this. One way is simply to apply thick paint to your canvas.
Now two things are worth bearing in mind, as we know oil paint is a slow drying medium this means the thicker the paint you apply this longer it will take to dry. Its worth remembering that the paint if the paint is touch dry on the outside it can be wet on the underlayer/or inside the paint application.
Beeswax Pastes are a traditional and popular choice and our Michael Harding Beeswax Paste is made with high-grade pure bleached beeswax, to add flexibility, with viscous linseed stand oil, chosen for its elasticity and stability and increase the viscosity of your oil paint.
The general recommendation is to add 10-20% to neat oil colour as required.
If you need something that will dry more quickly, then a Liquin Impasto medium will serve you well. It is a quick-drying, semi-gloss medium which thickens slowly & extends tube colour retaining crisp textures & brush marks without any visible leveling.
It halves the drying time of oils (touch dry in 1 -6 days depending on colour film thickness).
Glazing consists of applying a transparent layer of paint over another dried layer of paint, usually. To achieve the correct fluidity for glazing it is bestfor it to be reduced with a glaze medium. Glazing creates a unique stained-glass effect that is very difficult to be achieved through direct mixing of paint. Generally painters glaze a painting to create a kind of glow. That’s where the science comes in. Light travels through the transparent layer and is reflected back by the opaque layer. Conversely, a thin, dark glaze applied over a more chromatic, opaque base can create depth of colour in a shadow.
There are so many options when choosing colours for your oil paint palette. The set of colours you choose will depend upon the effect you want to create and your subject matter. But using a small but diverse selection of pigments in your paintings can bring many benefits to your practice and give you a better understanding of colour theory in general. A limited palette can also enable the viewer of your piece to see organisation and harmony in your work.
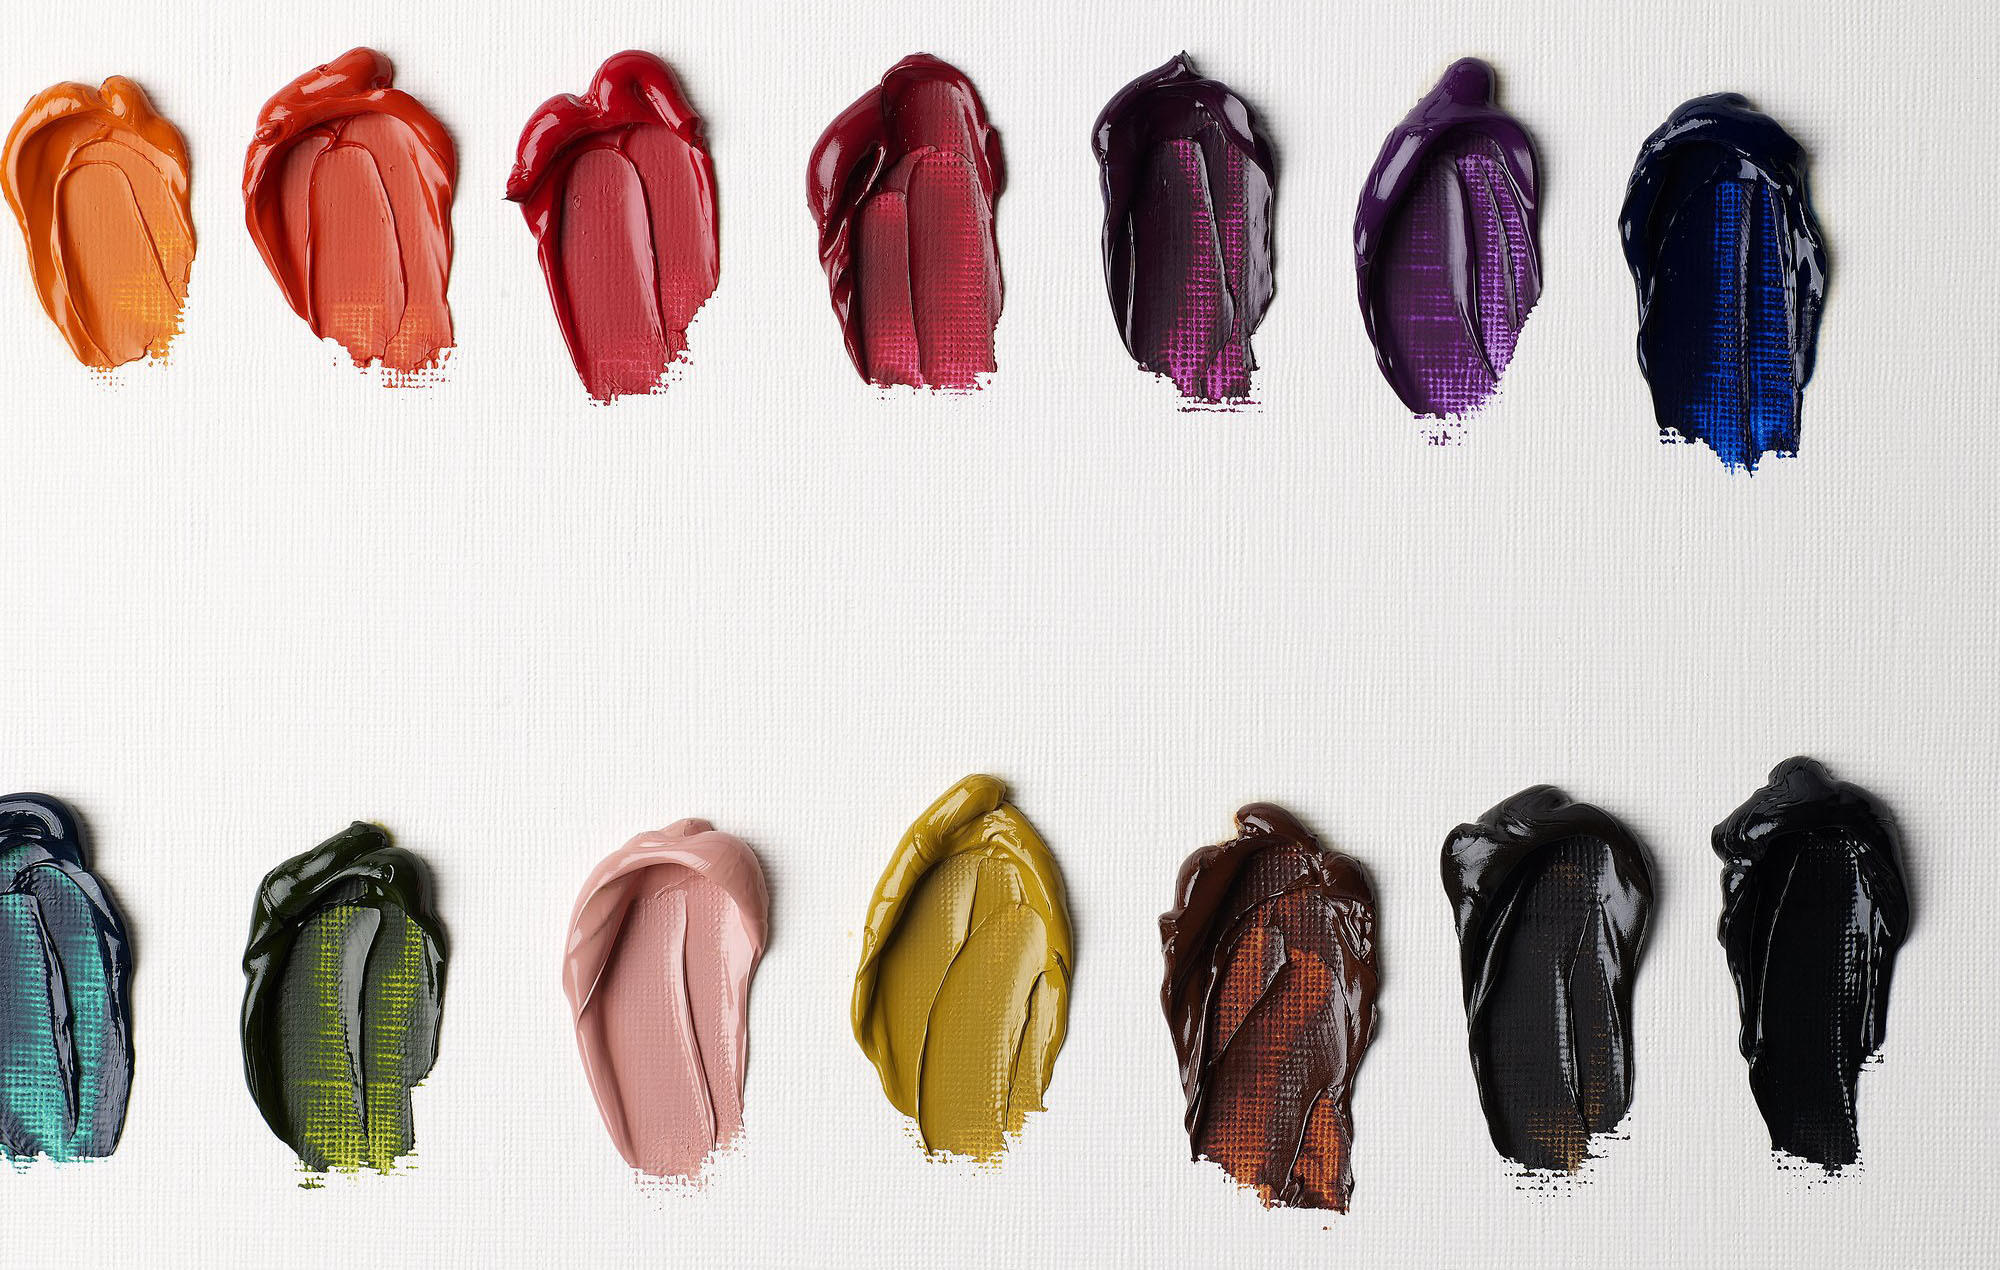
Cadmium Yellow - Known for its warmth and vibrancy, cadmium yellow serves as a versatile cornerstone in a limited palette. Its concentrated pigments allow for effective highlights and nuanced mid-tones, making it an indispensable component for capturing radiance in your paintings.
Alizarin Crimson - A deep, cool red, alizarin crimson's versatility makes it a must-have. It lays the foundation for rich purples, subtle shadows, and muted tones, providing flexibility to achieve a range of hues without overwhelming your palette.
Ultramarine Blue - Deep and cool, ultramarine blue contributes to atmospheric effects, deep shadows, and cool tones. Its inclusion in a limited palette expands your color range when mixed with other primaries, allowing for a variety of secondary hues.
Burnt Sienna - With warm, reddish undertones, burnt sienna adds earthiness and warmth to your palette. Ideal for creating natural tones, this color can be adjusted with other hues to achieve a spectrum of browns, offering versatility within a limited selection.
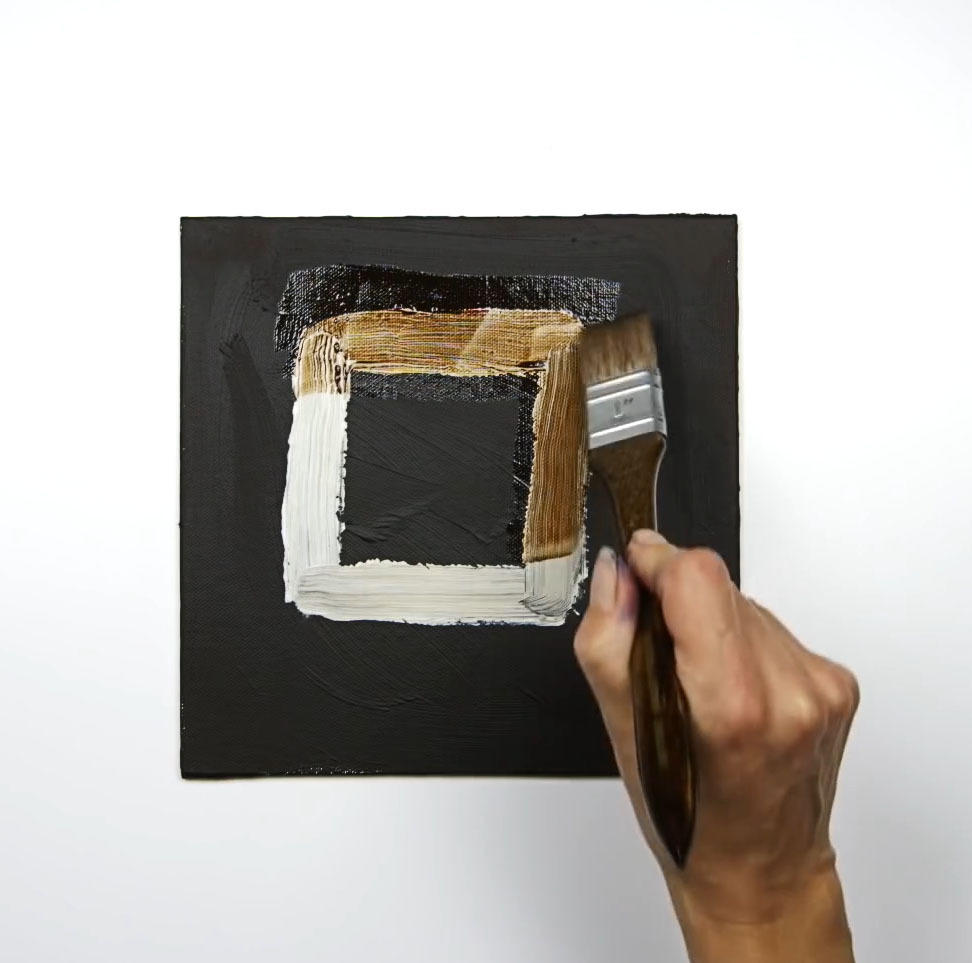
Working with a limited palette sharpens your colour mixing skills. Experimenting with the interactions between your chosen colours deepens your understanding of colour theory, fostering an intuitive sense for creating a diverse range of hues. Even limiting yourself to only 2 or 3 colours can vastly improve your tonal read of colours. Example below with one of my colour studies of taking 3 different colours and experimenting with creating different tones of black


An easel is an essential tool in art, serving as a supportive framework that holds canvases or other surfaces in place while artists work. Its primary role is to provide stability, adjustability, and versatility, enabling you to comfortably create your artworks.
If you're adventourous and painting outdoors is for you, it's best to invest in an easel that is compact and portable. If you're lucky enough to have an artists studio then a sturdier Studio easel such as Mabef easel may be best for your practice. In a spare room you may need to move or store your easel when not in use. You will need something lightweight or even collapsible.
If you are producing and displaying large-scale impactful paintings and drawings, these are for you. Sturdy, robust, and made from beechwood, these studio easels are fully adjustable, easy to work with and can take large canvases. Both easel stands are first-rate for display purposes, making them a splendid choice for open studio events.

We have a vast selection of easels and sometimes it can be difficult to decide which is best for your practice, from Studio and Field to Table Top and Display. We've put together a comprehensive guide for you to give you an idea of the characteristics of each so you can make an informed decision on what is best suited for your practice - Read here.
Natural daylight plays a vital role in our ability to perform various tasks efficiently. In its absence, artificial light becomes the go-to option. However, when it comes to precision work or boosting our spirits, artificial light falls short compared to the benefits of natural daylight.
Enter the Daylight Company – they bring the brilliance of daylight indoors, offering lighting solutions to counter the darker winter days that lie ahead.
Crafting beautifully designed and ergonomic lamps, the Daylight Company prioritizes delivering the best light quality. Their creations ensure that light can be precisely positioned wherever needed, promising an illuminated and invigorating environment even on the gloomiest winter days.
SO WHY DO YOU NEED GOOD LIGHT?!
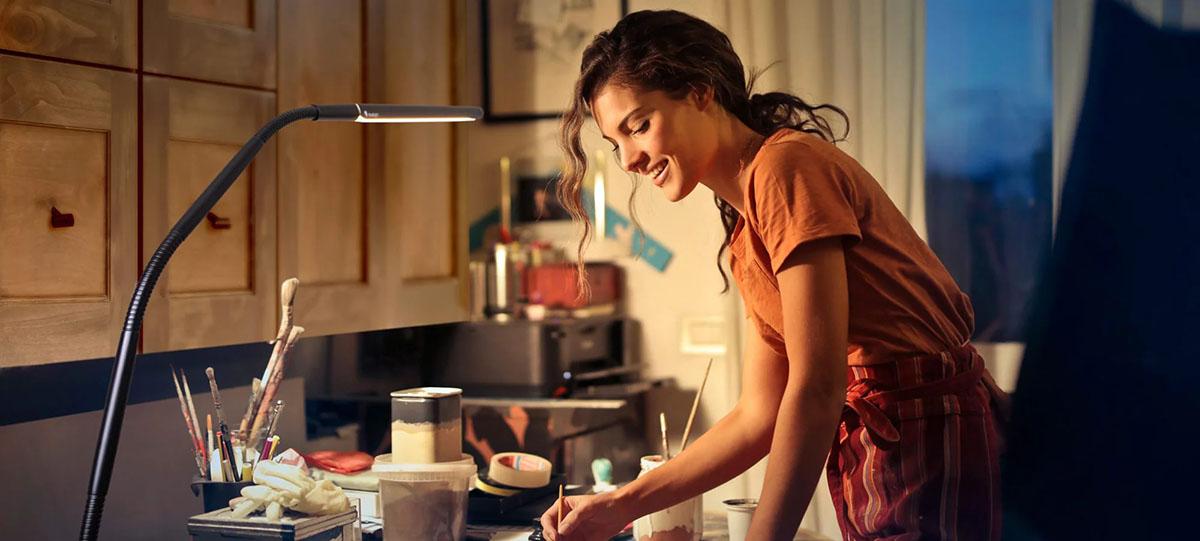
TRUE REPRESENTATION OF COLOUR
True Representation of Colors: The ability to perceive and reproduce colors accurately is crucial for artists. Good lighting, especially natural light or high-quality artificial light with a high Color Rendering Index (CRI), ensures that artists can work with a true representation of their chosen palette.
PRECISION WORK
Whether it's fine details in a painting or intricacies in a sculpture, artists need to see their work clearly. Adequate lighting minimizes shadows and enhances visibility, allowing for precision work that captures every nuance.
MOOD - POSITIVE ATMOSPHERE
Well-lit spaces contribute to a positive and uplifting atmosphere. Natural light, in particular, has been linked to improved mood and increased energy levels. A well-lit studio becomes a haven where creativity flourishes.
REDUCING STRESS
A well-lit studio contributes to a stress-free working environment. Reduced eye strain and improved visibility mean artists can focus on their craft without unnecessary physical strain.
ADAPTING TO VARIOUS MEDIUMS
Artists often work with diverse mediums that require different lighting conditions. Good lighting allows for versatility, enabling artists to seamlessly transition between painting, sculpting, drawing, or any other medium, each with its unique lighting requirements.
We've put together a comprehensive blog on how to light your studio environment to best suit your practice, which you can read here.
Add To List
Add a Wishlist
form to add wishlist here