
How To Write With A Fountain Pen
Posted by Cass Art on 5th Mar 2019
Who doesn’t marvel at calligraphy and handwritten script fashioned in beautiful fountain pen? Classic and elegant, it’s no wonder that ink handwriting is well-loved by stationery fans and is an enduringly popular creative practice.
So how do you write with a fountain pen? When you see flowing handwriting on beautiful paper, it’s tempting to want have a go at hand-script for yourself. However, many of us aren’t used to writing with a fountain pen. To ensure you get the best results from your adventures in calligraphy, check out our tips on writing with a fountain pen.
1: Select your writing tool
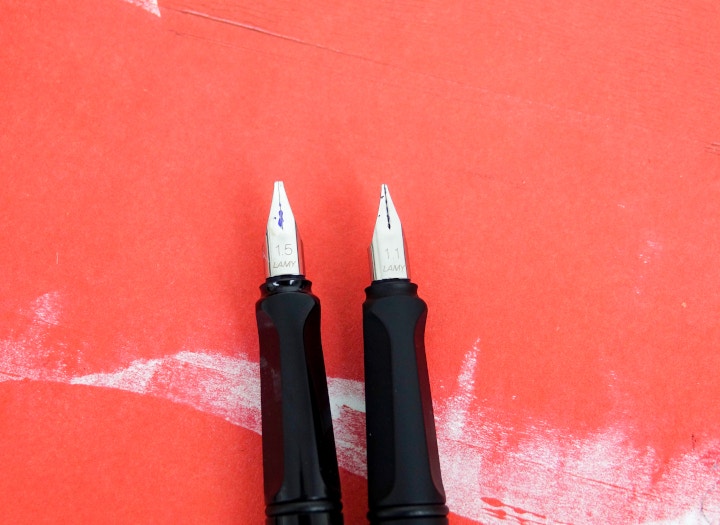
First, choose a fountain pen. Consider how you write and what overall effect you want. Many fountain pens will give you a choice of nib sizes and we have a range of brands to choose from, including Lamy, Rotring and Pilot.
Do you want to write small delicate script or are you looking for large, expressive calligraphy pieces? For diminutive, precise writing, select an extra fine or fine nib pen. If your hand-lettering style is looser, go for a medium or broad nib. If you’re not sure, plump for a standard-size fountain pen, have a play and discover your style.
2: Find your flow
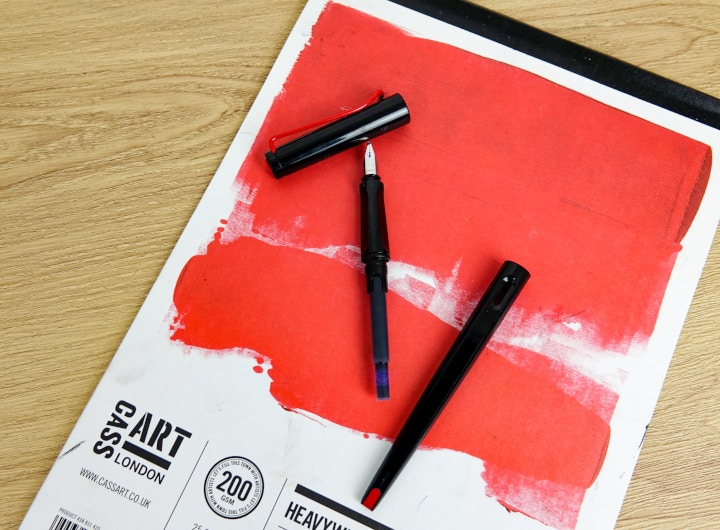
Unscrew your pen and insert your ink cartridge by placing the narrower end inside the nib section of your fountain pen. Make sure it’s firmly ‘clipped’ into place. Now hold the fountain pen nib down for a few minutes (go make yourself a cup of tea) so the ink flows down to the nib.
3: Perfect practice
Before you start writing, practice by making marks with your fountain pen. This way you’ll find a comfortable holding position and writing pressure.
Try to position the pen at around a 45/55-degree angle to your writing surface. Fountain pens don’t tend to write as well if you hold the pen either directly upright or low-down, skimming the side of the paper.
Fountain pens can flow lightly across your paper, so you don’t need to apply as much writing pressure as you would with a ballpoint or gel pen. Don’t grip the pen too hard or hold too much tension in your hand. Try leading with your arm, rather than trying to control the fountain pen with your hand. In short, loosen up. Keep practising and mark-making to find the correct pressure on the page and writing flow for you.
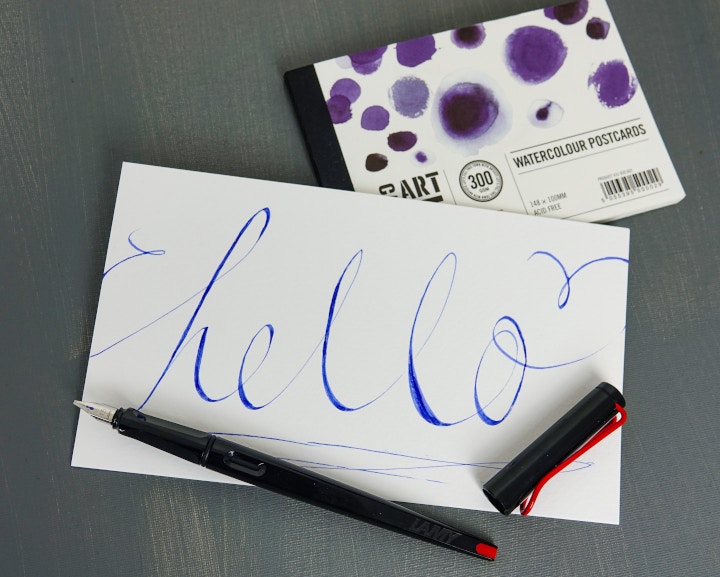
Take it slowly and enjoy the mark-making process. Draw curves, loops, flourishes, short and long lines to see what kind of line your fountain pen makes.
4: Word up
Once you’re comfortable with using your fountain pen, you can work up some beautiful hand-scripted text. To warm up, write some quick script to see how you write with the pen naturally.
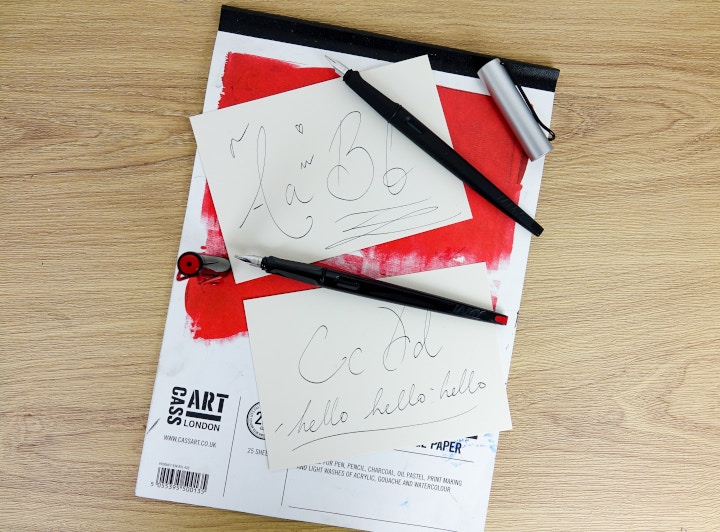
Start with the letters of the alphabet. Practice with individual letters in upper and lower case before you commit to a full-on calligraphy script.
When you’re happy with your individual lettering, now work on joining those letters to make words. Remember the curves, loops and flourishes you made in your practice session and incorporate this into your written text.
And don’t worry if your first attempts aren’t perfect. The experts take years to perfect their lettering.

