
Step by Step Fashion Illustration with Scott Mason
Posted by Cass Art Staff on 26th Jan 2022
Fashion illustrations are meant to be quick, fun and energetic. These 3 techniques will breathe some life into your work, if I ever feel uninspired or in routine I experiment with techniques like these as you can never control the outcome but you can have some fun whilst doing it.
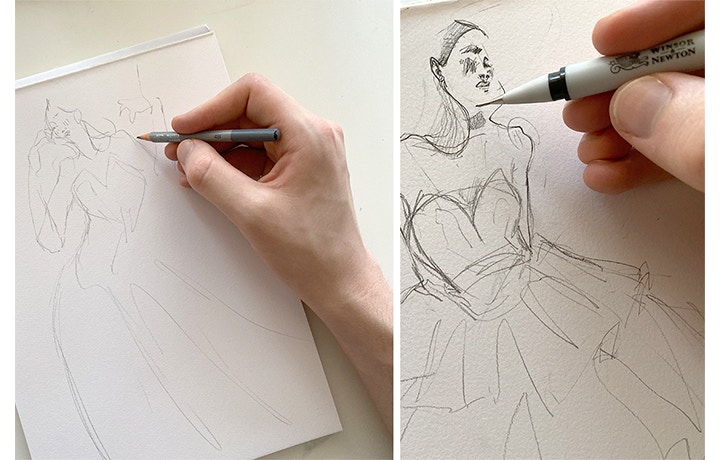
Step One:
These techniques are based around being the finishing touch, so you still need to start with an illustration. I start by sketching with a Winsor & Newton 4b pencil, the leads softer so it glides across the paper easier and helps with faster, spontaneous lines.
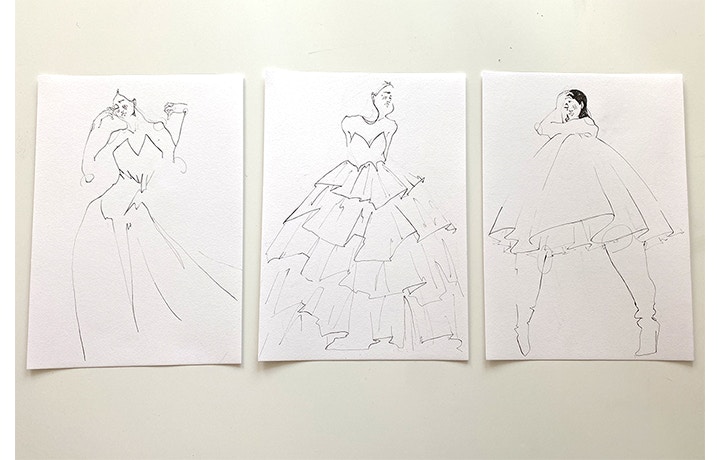
Step Two:
Once I’ve got the pose and garment shape sorted I begin inking with Winsor & Newton fineliners, I ink everything with a 0.1 as it’s the thinnest nib so dries quickest, I rub out the pencil lines after that and then go over other areas with 0.3 and 0.5mm nibs to add some variety in line widths which helps add depth to your line art.
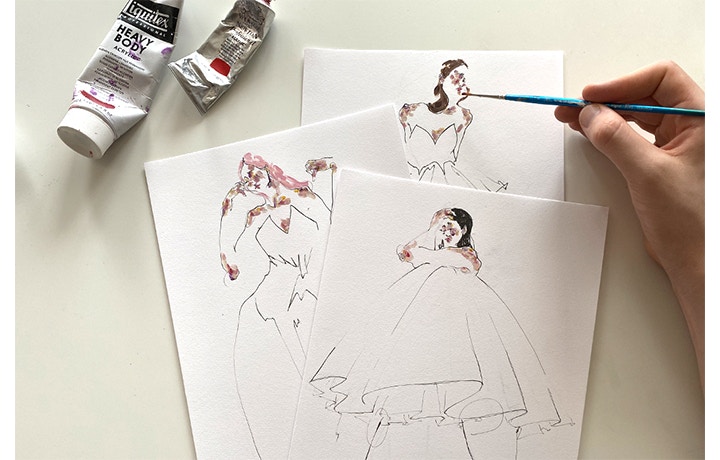
Step Three:
As I said the techniques are the finishing touches so I’ll normally paint the figures face and hair before I begin. To paint I use a mixture of Liquitex Heavy Body paints and Winsor & Newton Acrylics, I use a mixture of parchments, burnt umber, white, portrait pink, turner yellow and violet to get a mixture of skin tones. Once the paints dry I’ll go over the fineliner areas once more as I tend to paint over a lot of the lines I’ve drawn.
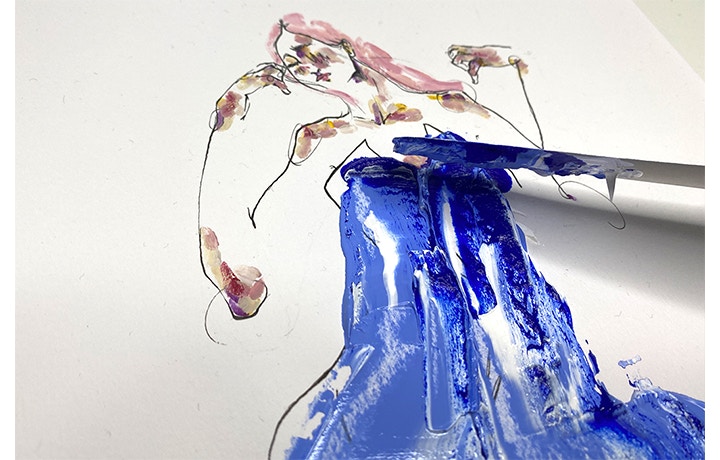
Step Four:
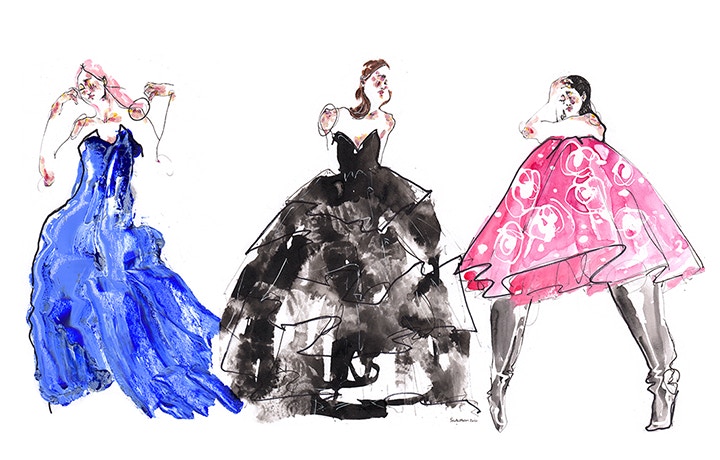
Now for the fun! The first technique is using Liquitex Heavy Body Acrylic and a palette knife, blob some paint on the top of the dress, I used white first then two blue colours on top as I wanted the white to be at the bottom of the dress so had to apply that first. Once you’ve blobbed the paint at the top grab your palette knife and carefully squash the paint and glide it down the page in the direction of your garment, the colours should mix together gradually and create this beautiful tone and texture!
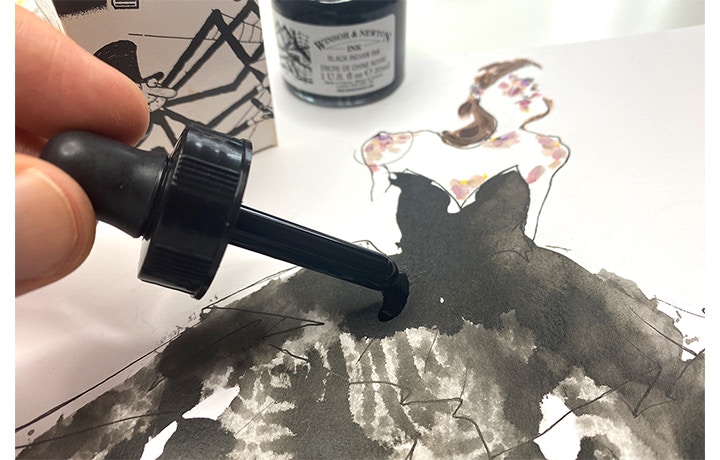
Step Five:
Now this ones messier and you got to move quick! Apply generous amounts of water to your illustration, only where you want colour to be. Enough water that it puddles slightly but not too much that is spreads everywhere. Once you’ve applied the water grab your Winsor & Newton Black Indian Ink. Which comes with a built in dropper and drop the ink in starting from the top. And working your way down, seeing the ink. Cascade across the water and create the dress. If you’ve applied a bit too much ink or water (as I normally do) grab some kitchen roll and blot it a bit, otherwise it’ll take hours to dry and probably stain the surface you’re using.
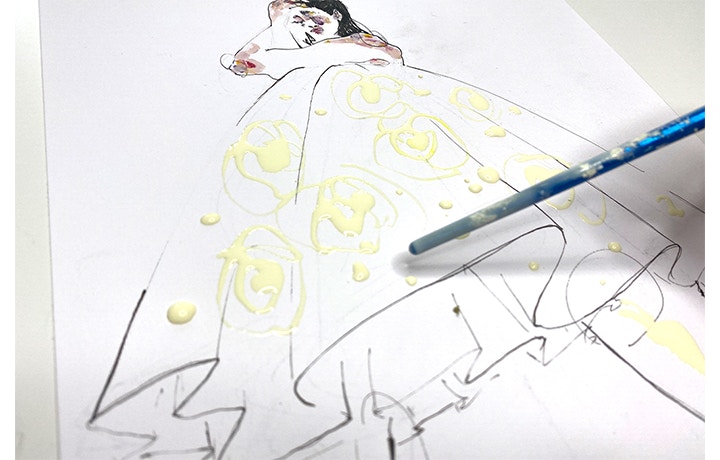
Step Six:
Here’s the final one, using masking fluid and the plastic tip of a paint brush dip it in the fluid and map out some shapes, this techniques great for flowers, sparkles or depicting shiny surfaces. It’s important you wait for the masking fluid to be 100% dry before you go onto the next step so go get a cuppa.
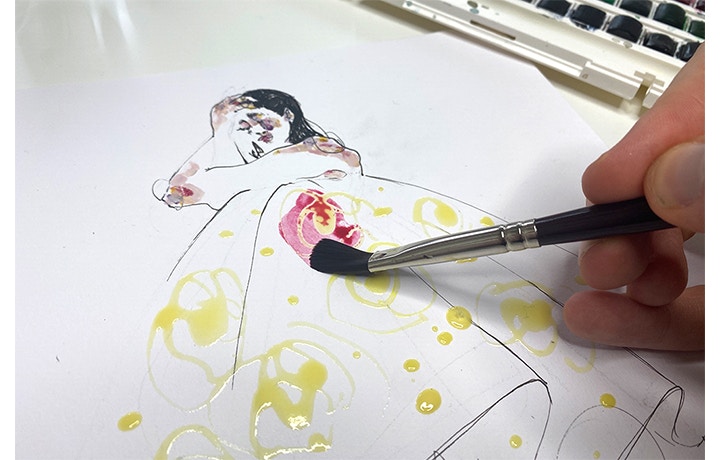
Step Seven:
Once it’s fully dry, to check just touch it with your finger, it should be tacky but not come off onto your finger. Now grab your water colour paints, for this I’m using Winsor & Newton Cotman water colours, pick whatever colours you fancy then start painting! All over the dress and the masking fluid. Again, now you got to wait for it to dry.
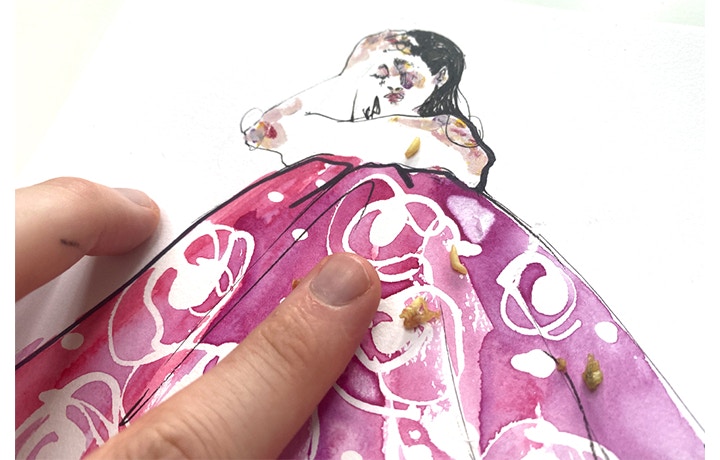
Step Eight:
Once it’s fully dry, be patient! Then you can rub out the masking fluid, you can use your finger or a flat utensil, I use my finger and have the blisters. To prove it, just cause some friction to the paper and the masking fluid will lift right off. Then Ta-da, your flowers or shapes reappear! This one can also be used if you paint the dress a colour, wait for it to dry, then apply masking fluid, wait to dry, then paint on top, then dry then the masking fluid will keep the original colour you painted instead of just the white of the paper.
And that’s my 3 techniques! Give them a go, it’s fun to just give something a try that’s not your usual thing, don’t be too precious about it and just experiment.
Feeling Inspired?
Check out more of Scott's wonderful work on his Instagram.

