
How To: Create a Marble Effect with DAS Modelling Clay
Posted by Cass Art on 31st Dec 2019
Inject a splash of colour into your sculptures and models with the DAS Idea Mix. Combine the pigmented modelling clay with either the DAS White or Terracotta Clay, to create a range of effects and patterns. We put the DAS Idea Mix to the test and invited Crafter and Blogger, Katie at The White Journal to give her advice and easy to follow steps to creating your own marble effect.
“I’ve been using this clay for years and years and it is great value for money – it lasts ages and doesn’t dry out thanks to the re-sealable packet. I was really happy to see they now do it in different colours too – much easier than having to paint it afterwards as well as being able to create a marbled effect, which I’ll walk you through in this DIY.” - Katie
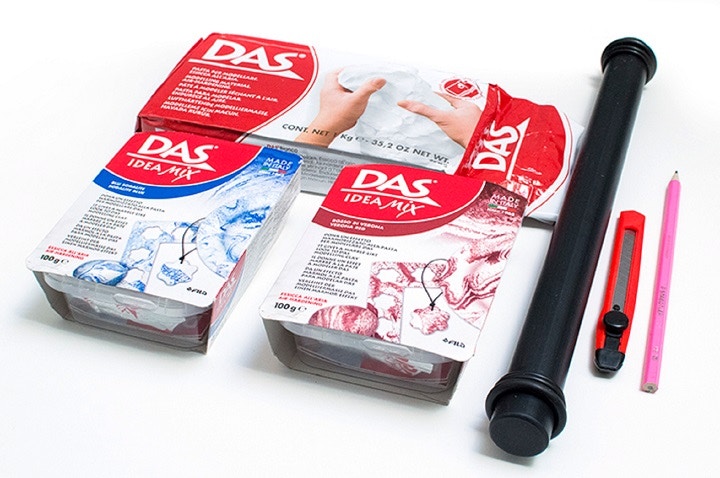
You Will Need:
DAS Modelling Clay - available in White or Terracotta
DAS Idea Mix - available in a range of colours
Rolling Pin
Mat or protective sheet
Craft Knife
DAS Vernidas to Varnish
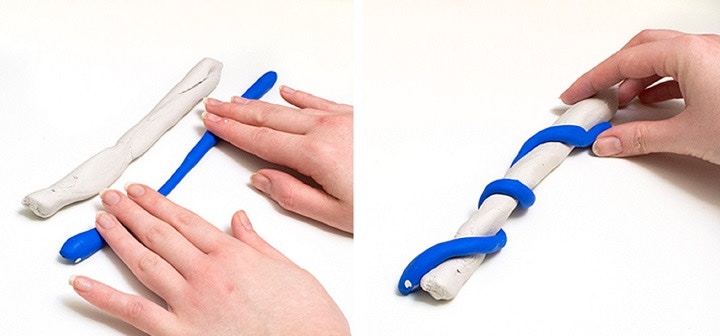
STEP 1
Preparing the Clay
Take a generous amount of the white clay and a smaller piece from the idea mix. Roll each piece into sausage shapes, until the clay is malleable and easy to work with. Roll the coloured clay into a slightly longer and thinner sausage in comparison to the white - aim for a ratio of 1/3 coloured and 2/3 white. As the clay is air drying, ensure that the remainder from each pack is tightly wrapped up, so that you can use it again.
STEP 2
Mixing the Clay
Wrap the coloured clay around the white clay, ensuring it reaches each end. Next, squish the clay together and use your hands to knead the clay into a ball shape. This will disperse the blue throughout the white in patches.

STEP 3
Roll out the Clay
Next, take your rolling pin and begin rolling out the clay. The Das Rolling Pin have bands which can be removed or fastened to either end for easy grip, as well as to allow an even width for your clay. They bands come in a variety of sizes to vary the depth of your clay.
STEP 4
Defining the Marble Pattern
Roll the clay out until it is around 5mm thick. Next, fold the clay in half, and then in half again, then roll out the clay again to a similar thickness. The marble pattern will be defined by the number of folds you work in. For a bold pattern, you will only need to do this twice, whereas for a thinner, more subtle pattern, repeat this process 3-4 times.
Now your clay is ready to be sculpted into your desired craft idea. You can work directly into the clay with a craft knife or cutter to lift shapes from the pattern or wrap the clay around different objects to create a range of ceramic shapes, such as plates, bowls and jewellery holders.
Watch the DAS Marble Sheet Video to discover more marbling tips and techniques. Why not try sandwiching blocks of colour between the white clay and cutting out rings to layer and create your pattern? Or why not combine two different colours to add a different stone effect.
Feeling Inspired?
For more crafting inspiration with DAS Modelling Clay, explore our DAS Inspiration and Ideas blog.
Have you sculpted with DAS Clay? Share your creations and top tips using the hashtag #DASClay on Facebook, Twitter and Instagram – and don’t forget to tag us!

