
How to: Watercolour illustrated houses with artist Phil Maltz
Posted by Cass Art on 15th May 2019
Artist and illustrator Phil Maltz takes command over brickwork with his quirky and playful illustrations of the streets of London. Follow his fantastically clear step-by-step guide and try out his techniques for yourself to create your own watercolour illustration of a colourful street of Camden houses:
WHAT YOU NEED
- Uni pin fineliner
- Cass Art Artists' watercolour set
- Posca pen white
- Set of Cass Art synthetic brushes
- Cass Art watercolour pad
THREE TOP TIPS TO GET YOU STARTED
1. Always have some kitchen roll on hand to apply to any watercolour mistakes. Dab the surface with varying degrees of pressure to lift unwanted paint.
2. Use two jars of water for double rinsing brushes. This really helps to keep colours from getting muddy.
3.The number of times I've almost given up because of self-doubt, or not thinking my artwork was going to work out. Always finish what you start because there's always something to learn from the experience, whether good or bad.
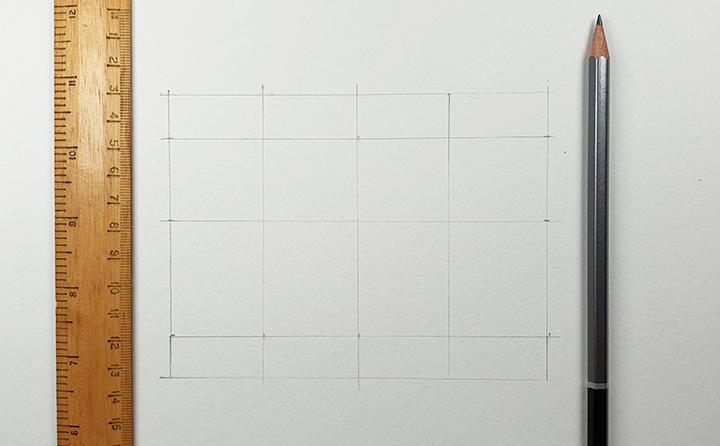
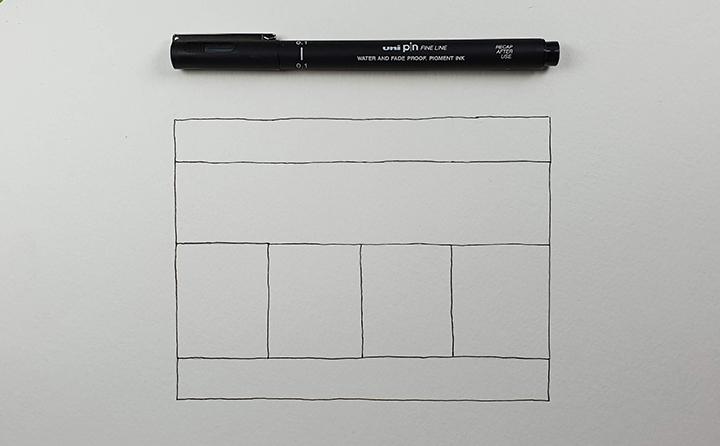
STEP ONE - FINELINER FRAME
Start by creating a grid that divides our row of colourful houses into Roof, 1st Floor, Ground Floor, and Pavement. Create vertical divides the houses into 4 separate
units.
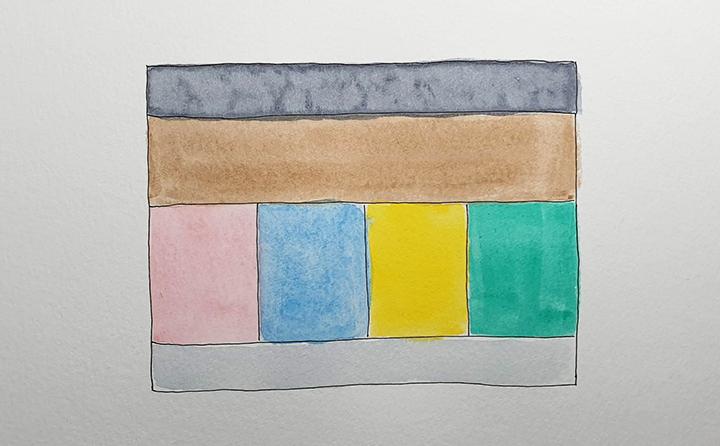
STEP TWO - WATERCOLOUR BASE LAYER
Mix up a bluey grey (roof), light brown (brick foundation), 4 pastel colours (facades), and a light grey (pavement). Apply these colours to your grid. TIP: Allow each colour dry before applying the next to avoid colour bleeding.
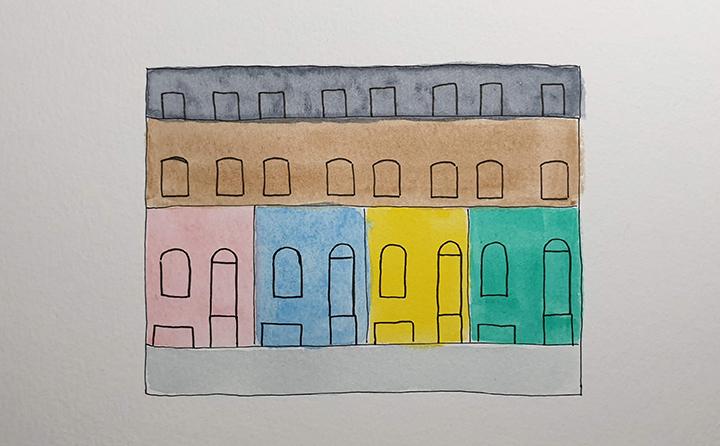
STEP THREE - FINELINER GUIDES FOR WINDOWS AND DOOR
Once all paint has dried, applied some new guides for where the doors and windows are located. This will help when adding your tile and brickwork, as you can leave these areas blank for the time being.
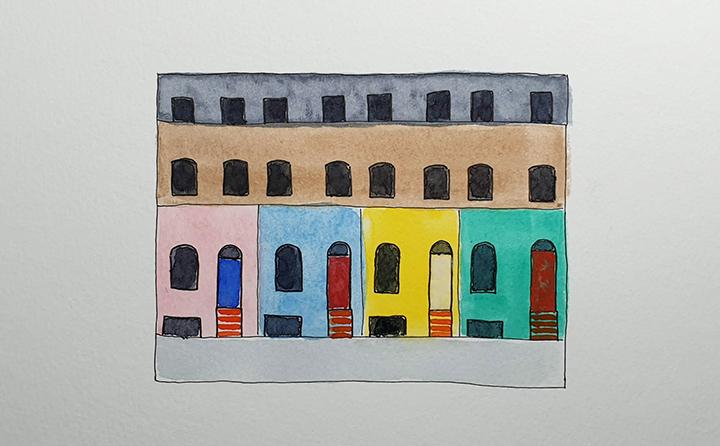
STEP FOUR - WATERCOLOUR DOORS AND WINDOWS
With a medium flat brush, mix up a dark tone (either a black or a dark blue-gray). Now fill in the windows. You can also apply your choice of colour for each of the four doors and steps at this point.

STEP FOUR - WATERCOLOUR DOORS AND WINDOWS
With a medium flat brush, mix up a dark tone (either a black or a dark blue-gray). Now fill in the windows. You can also apply your choice of colour for each of the four doors and steps at this point.
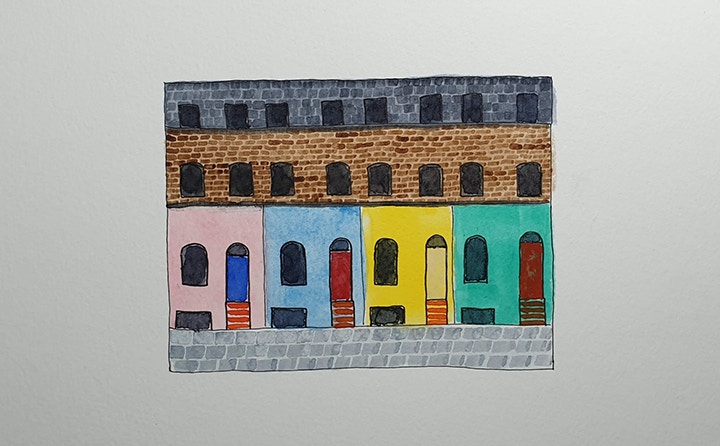
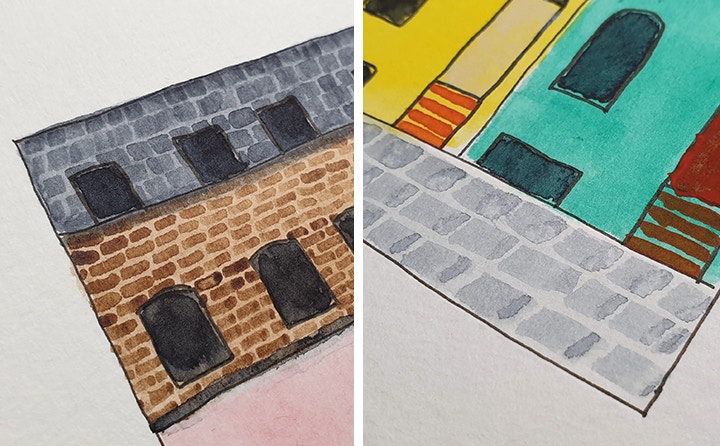
STEP FIVE - TEXTURES
Now using a small flat brush, start add rows of short strokes for the roof tiles and brick patterns. You may want to use a separate piece of paper to practise this part, trying different sizes brushes to see what size and colour works best for you. Try and keep the roof tiles square and the bricks slightly more elongated. Remember to stagger the alignment of each row to create a more realistic pattern.
TIP: Re-apply paint to some of the tiles/bricks to create more tone variation.
STEP SIX - WHITE DETAILS, WINDOW FRAMES
Your picture should now start to be taking shape. Now to add the white detailing using either a white Posca paint pen or some white gouache with a fine tip brush.

STEP SEVEN - BLACK LINE DETAIL, FACADES, RAILINGS AND AERIALS
Once everything is dry, you can now ad the finishing touches. This particular row of houses has a network of masonry panels, so use either a black Posca paint pen or a fineliner to recreate these, along with the railings and some suitably wonky aerials.

Thanks for your insightful How-To demonstration Phil!
FEELING INSPIRED?
See more of Phil's work on his Instagram

