Draw - Get Started Drawing Pets
Posted by Cass Art on 1st May 2020
Animals are a great subject to draw, as they span a tremendous amount of variety in forms, poses, textures and colours. For many, pets are a readily available, if not entirely cooperative model, and we all have access to film and photography. We're going to look at some general tips to get started drawing a live subject, and then have a little look at some broad ideas behind drawing animals.
Drawing Pets from Life
For anyone who has tried to draw their pets, you will often find that they very rarely sit and pose for you. The following might seem like more a list of tactics to capture them on paper, rather than actually drawing!
 Franz Marc – 'Lying Cat'
- Sleeping pets are an easy target, so if you are nervous about getting started, try waiting until your pet is asleep.
- They often want to get involved! This is a particular issue with cats, who tend to try climbing on my sketchbook, or grabbing at the pencil. Find things to distract them, such as toys, food, or a second person to occupy their attention.
- Keep it relaxed, and draw around them more if you don't already. Once they are used to seeing you draw, they tend to take less interest.
- Be prepared to work on multiple pictures at once, especially if you have a very active pet. Animals tend to repeat poses, so you can start several different drawings and cycle through them as your pet returns to the same poses.

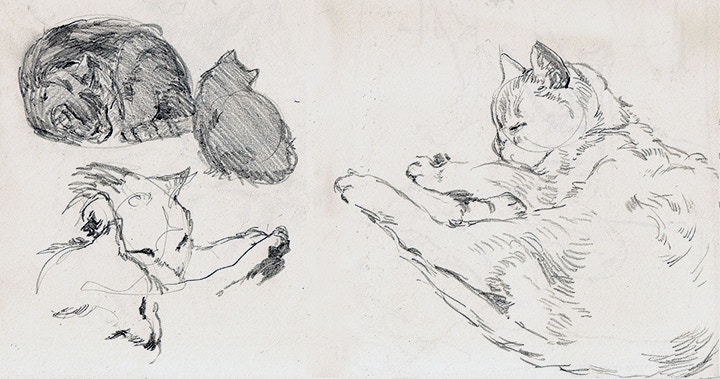
Edward Hopper – Cat Studies
It can be difficult to do a sustained study of a live animal, as they eventually move away or do something different. This means we may need to take photos. I do recommend drawing from life as much as possible, as it will make you more familiar with the three dimensional forms, and will help you capture a better sense of liveliness from photographic reference.
- Relax and take it slow. Pets tend to follow you less when you move slowly. They also can be impossible to direct – it is easier to let them settle down on their own.
- Be prepared to take a lot of pictures! Often I find animals will move and blur photos, or just turn the wrong way. Very few photos taken are useful.
- Distractions – just like drawing, many animals get curious and investigate. A second person can often help you with this.
- Think about eye-level. Usually you want to be around their eye-level, instead of looking down on them. This is essential to getting good portrait photos of pets to work from. Try holding your camera lower or crouching, or for smaller animals (and cats), placing them on a higher surface.
- Find a place with good light; natural light is often best. Black furred animals are especially hard to photograph, as cameras, especially on phones, compress the tones. Try to light them well– you can get some good fur colours just before sunset.
Animal Drawing Tips and Tricks
Although animals seem vastly different to us, most mammals, birds, reptiles and amphibians have the same body plan as us, morphed into different shapes. These general tips will get you started, without having to learn the proportions for every creature!
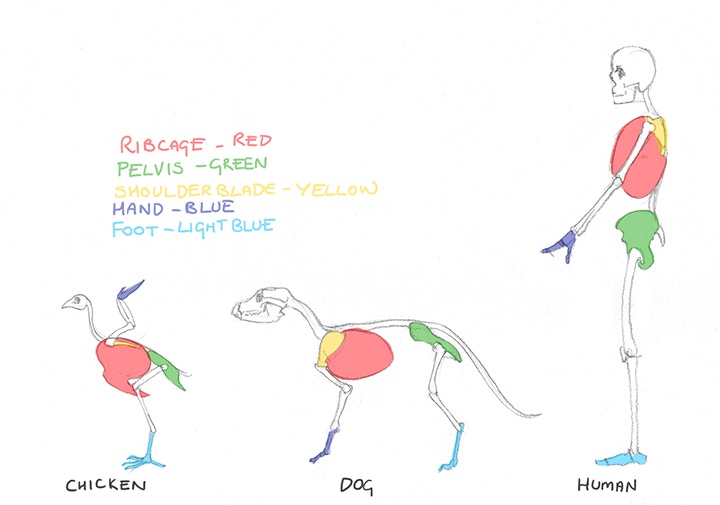
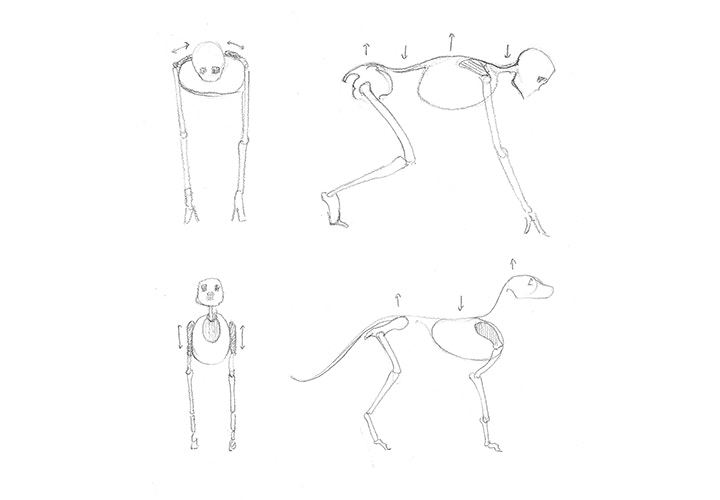
The spine is the core of the figure, and this is no different for animals. The human spine bends in different directions to an animal's; animal spines arch at the neck and bow at the ribcage, so the ribcage and skull hang off the spine.
 Another important difference is the shoulders. Many mammals (there are exceptions) have the shoulder blades at the side of the ribcage. It is worth keeping this in mind as we build up the rest of the body. One approach that works well is to segment the body into three sections for the forelimbs, torso and hind-limbs.
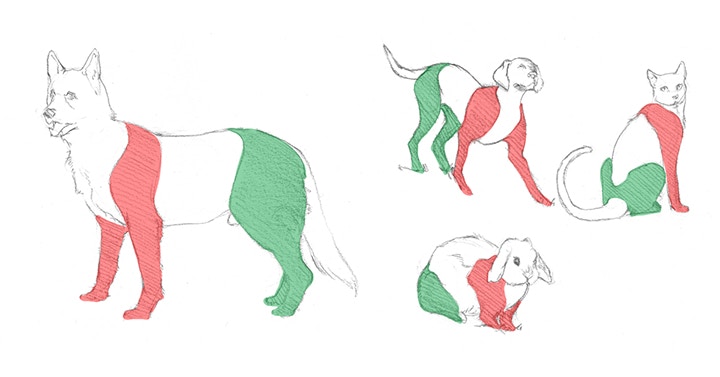
This segmentation helps us articulate limbs and maintain proportion.
In general, it helps to keep in mind the form and volumes of the animal you are drawing. Fur (or scale!) direction is also really important to describing the 3D forms of an animal, so keep an eye out for this.
Drawing Animal Heads
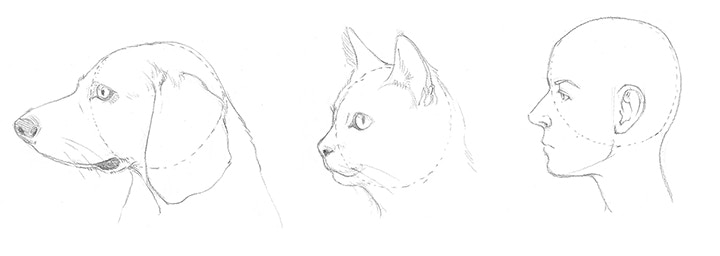
Most animals have a snout that protrudes more than our nose, and a much smaller brain case. It is usually a good idea to block in the general shape first, then start to place features.
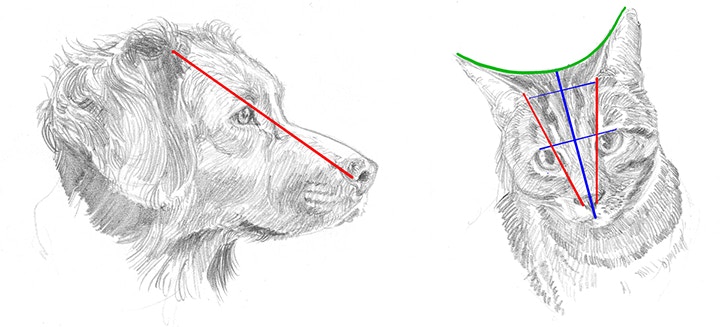
Whilst no proportions apply to all animals, there are still common patterns we can use. Like humans, animals have a line of symmetry down their centre (blue). This is useful for checking ears, eyes and nostrils are parallel and line up. As you place the features, find a line (red) that reaches from the nostril, alongside the eye to the ear. This works for a lot of animals, and otherwise is still a useful comparative measurement. For many mammals, it can help to use an arc (green) to get the angle of the ears relative to each other.
Over to You: Sketch Your Pets
This time the challenge is to get some practice drawing an animal from life. (If you don't have any pets, you can still use film, or window wildlife.) Keep the above tips in mind as you draw, but don't worry if you end up with some incomplete drawings either.
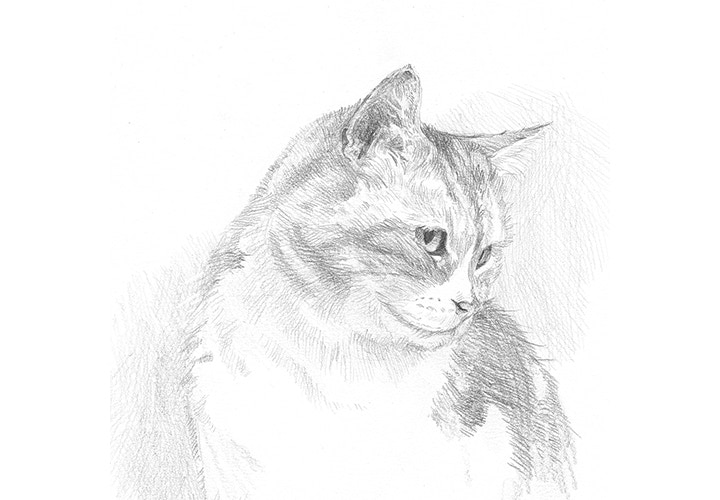
These sketchbook drawings were created from life.
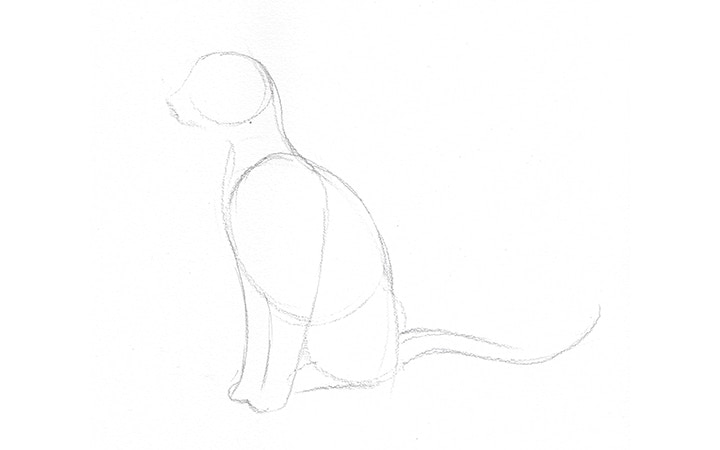
Step 1: Start with the spine, and block in some rough forms for the head, torso and limbs. Work the whole body at once; if your pet moves, you have the base to work on.

Step 2: Build up larger shapes, looking for more individualistic features like ears, face shape and fur shape.
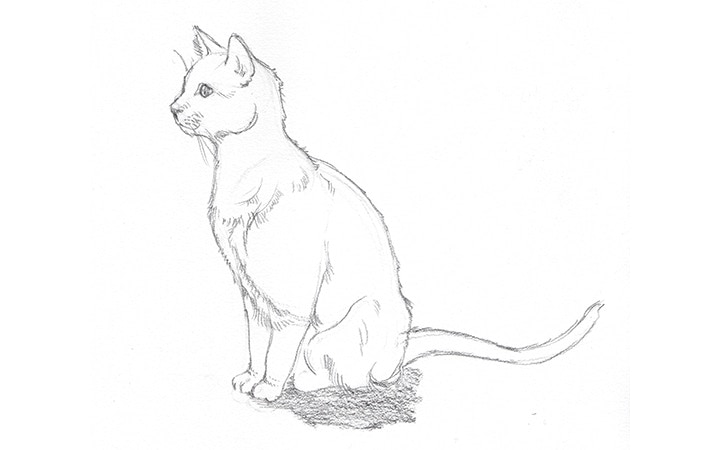
Step 3: Start to find contour lines. Remember, fur is soft, so look for broken and fuzzy lines. Contour is key to showing textures.
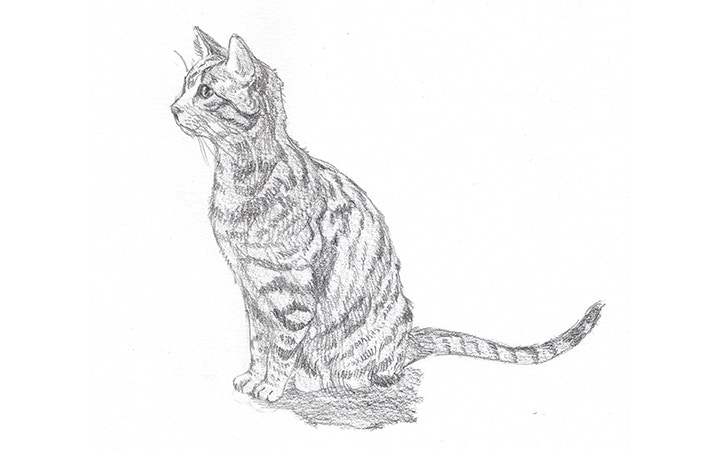
Step 4: Start to lay in tones and details. Once you have a good foundation, you can continue as long as you can manage.
These articles have been commissioned by Draw using the Draw Patreon, set up to provide tutors and life models at Draw with ongoing work during the cover-19 pandemic. Supporters to the Patreon receive regular life drawing and portrait refernce to draw from alongside weekly drawing articles on drawing from home.
Feeling Inspired?
Shop online for everything you'll need. Don't forget to hashtag #cassart on social media to show us your creations.

