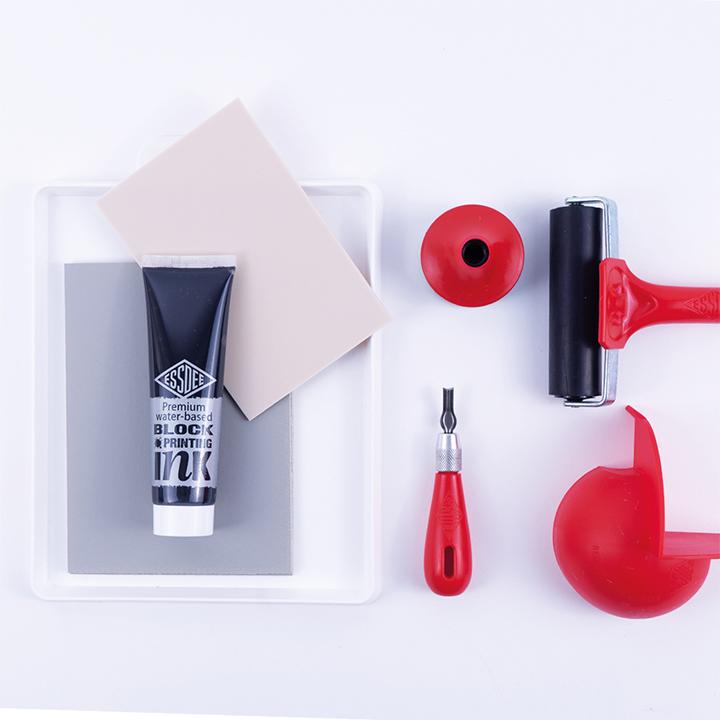
Our Lino Printing Set from Essdee is the perfect addition to your collection if you want to try your hand at Lino Cut printmaking. Containing 5 different lino cutter tips, some lino blocks, an ink roller, tray and more this extensive kit has everything you need! Follow our How To blog below to get started with this versatile and satisfying technique, whether you're trying lino for the first time or just looking for some inspiration the Cactus print is a bright and fun little project!
STEP 1
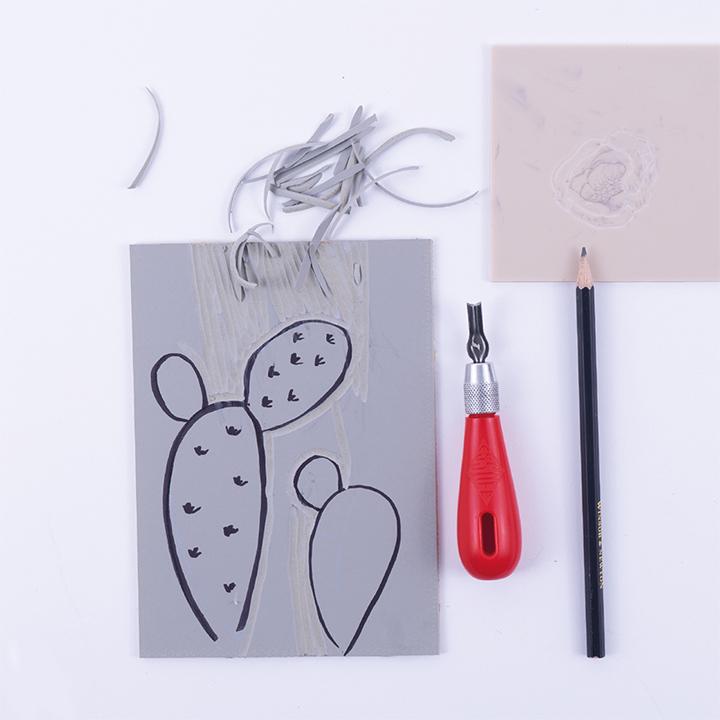
Draw your design onto the lino with a sharpie or other permanent marker, then take your lino cutting tool and slowly remove the lino around your drawing by cutting into the surface and gliding the tool slowly in a smooth straight motion. Try not to carve too deeply into the lino in one go, as you could lose control of the tool - and the blade is sharp! Wherever you leave raised on the surface is where the ink will adhere.
STEP 2
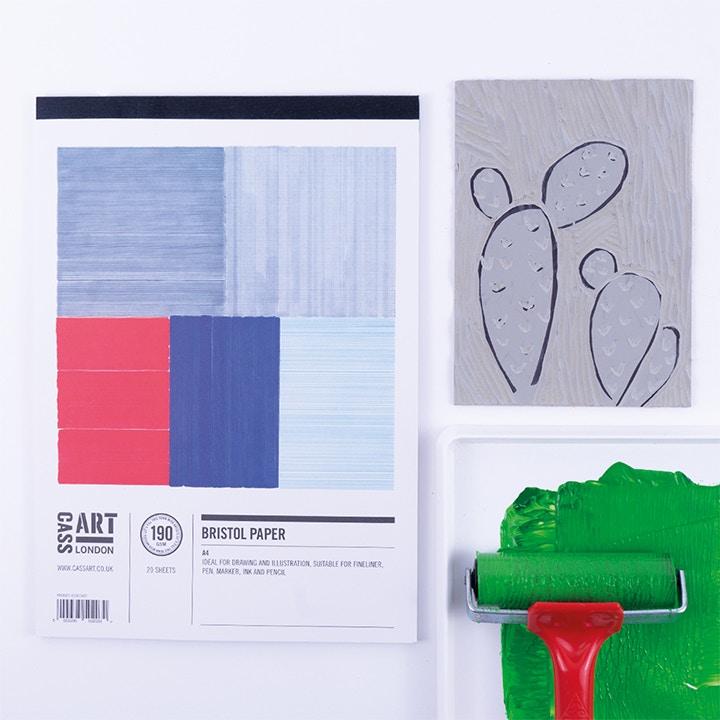
Once you have finished cutting around your drawing, squeeze a grape sized amount of ink onto your printing tray and begin to roll it onto the plastic surface, making sure you coat the roller evenly all over.
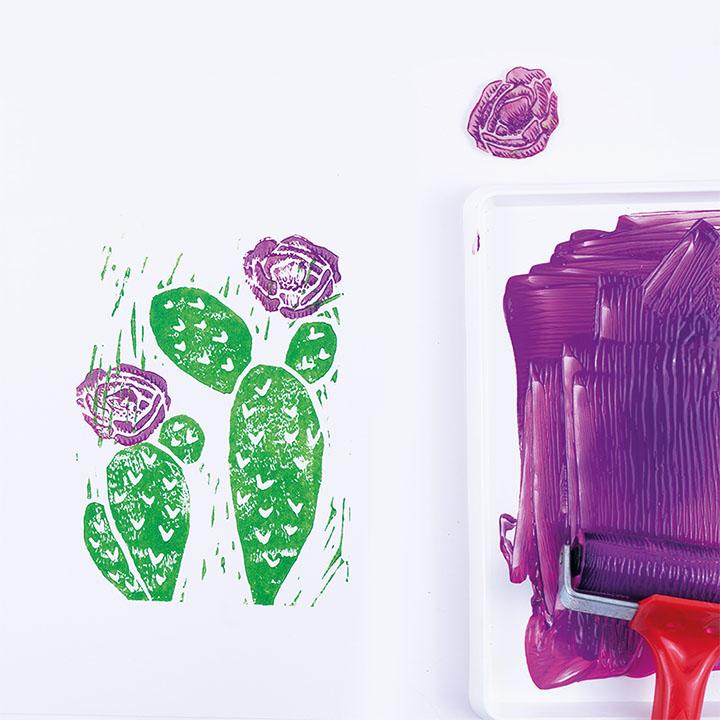
STEP 3
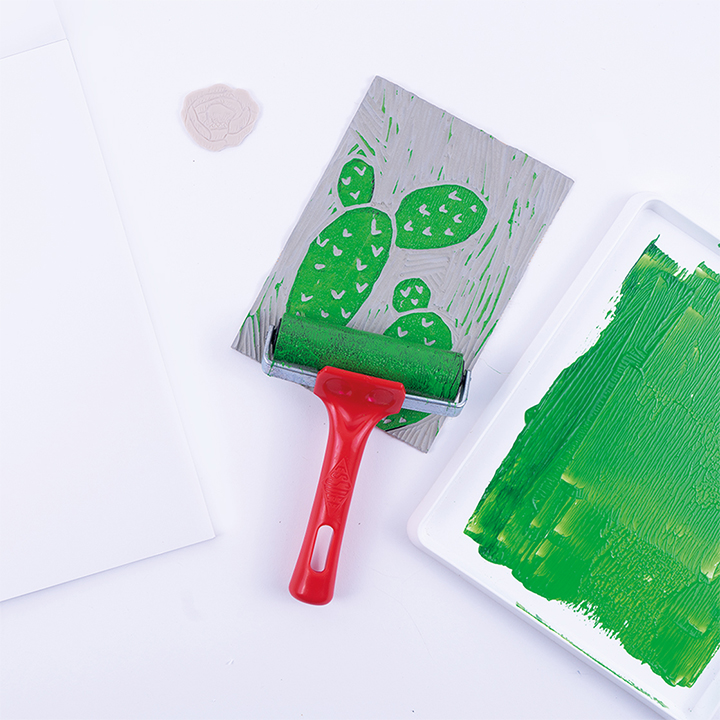
Roll your ink over the raised lino image evenly, here we've picked up a bit of the surrounding texture of the lino with the roller, to add some colour to the background of the print.
Top tip: Try not to use too much ink, this will cause your lino to slide on the surface of the paper when you press it down causing a blurred print.
STEP 4
Place your inked lino face down onto the paper and use the 'baren' in the Essdee kit to slowly and firmly press the lino down onto the paper, then holding the paper by one corner carefully pull the lino off the surface.
Top tip: Use small circular motions with the baren to get even pressure across the whole lino
STEP 5
Once you've finished your base colour use other lino carvings to add different colours and flourishes onto your print. We've decided to add purple flowers to our cactus!
So there you have it! The great thing about this type of printing is once you've carved your lino you can keep using it again and again, so it's a perfect technique for homemade cardmaking and gifting.
Our Lino Printing Set from Essdee is the perfect addition to your collection if you want to try your hand at Lino Cut printmaking. Click on the link in bio to follow our How To blog below to get started with this versatile and satisfying lino technique. Enjoy!