
How To: Customise Your Trainers with Tulip
Posted by Cass Art on 3rd Jun 2018
When it comes to customisation, crafters know how to vamp up their wardrobe in a flash. And what better way to add a splash of colour to your wardrobe than transforming your tired pair of trainers?
Transform your fabrics with the latest range from Tulip.
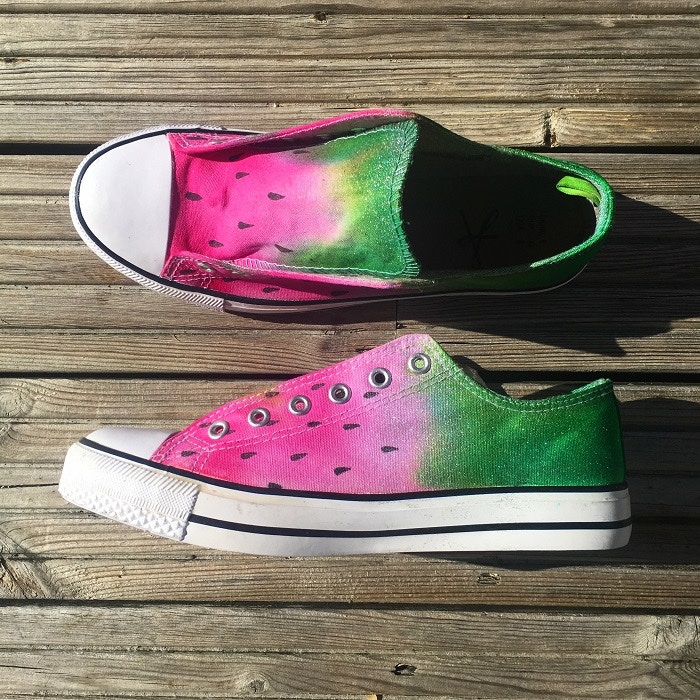
We decided to put their latest products to test. We’ve broken down how to create our Watermelon inspired kicks with a simple guide to ombre tie dying, glitter sprays and fabric markers…
What You’ll Need:
- Two plastic bowls
- A Paintbrush
- A Pair of Rubber Gloves (Included in the Tie Dye Kit)
- Vaseline
- Newspaper
- Tulip Colour Shot Spray Paint
- Tulip Assorted Fabric Markers
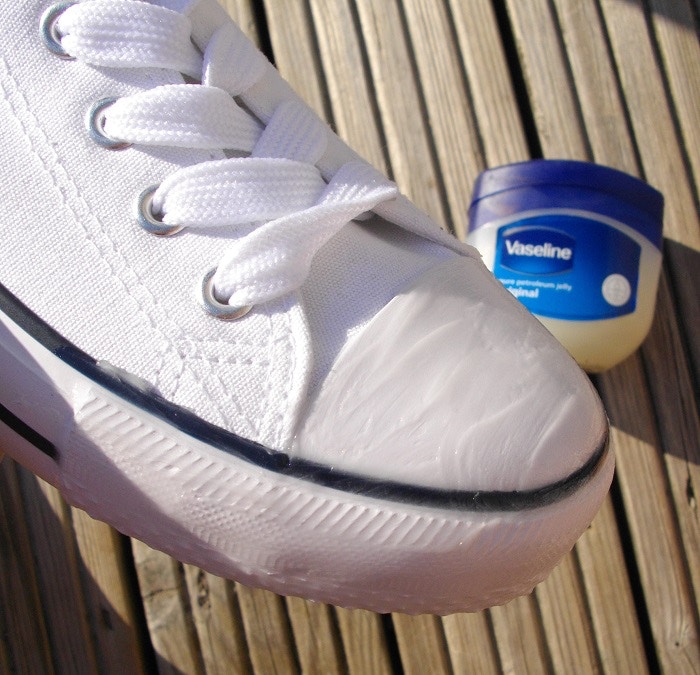
Step One: Prepare Your Shoe
Apply a thin layer Vaseline to the areas that you do not want the dye to take, such as the white tread of the sole. This will stop the dye from taking and staining the areas you want to remain white. Be careful not to get any on the fabric itself, as this will act as a resist and the dye will not take.
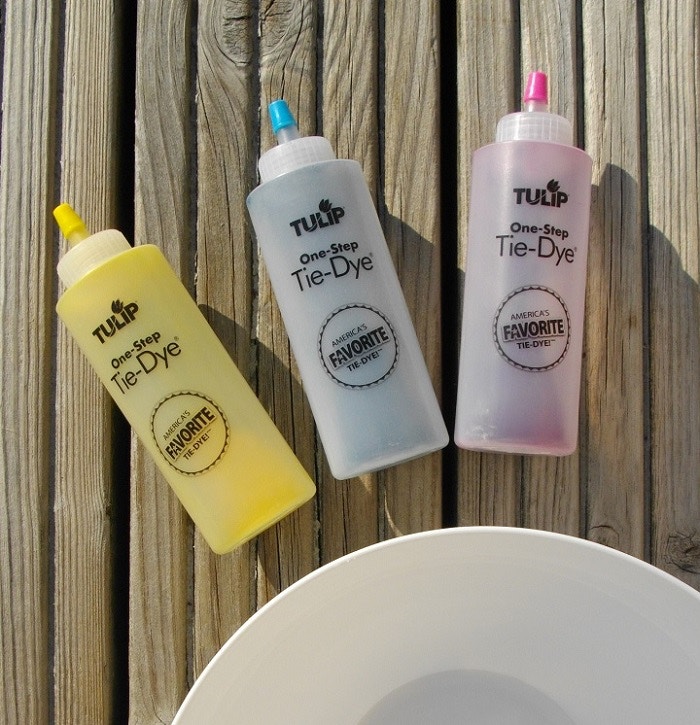
Step Two: Prepare your Tie Dye Kit
The Tulip Tie Dye Kit is the easy way to apply dye straight to your fabrics. Simply unscrew the top and fill each bottle with water up to the guideline on the reverse. Make sure the top is secure (to avoid disaster) and gently shake the bottle to ensure the dye is fully mixed with the water.
Once ready, the dyes keep their strength for up to 45 minutes and can be diluted with more water for a softer colour. Make sure you are wearing gloves at all times at this stage; the dye is highly pigmented and fast to take. Trust us - it doesn’t come off for days…
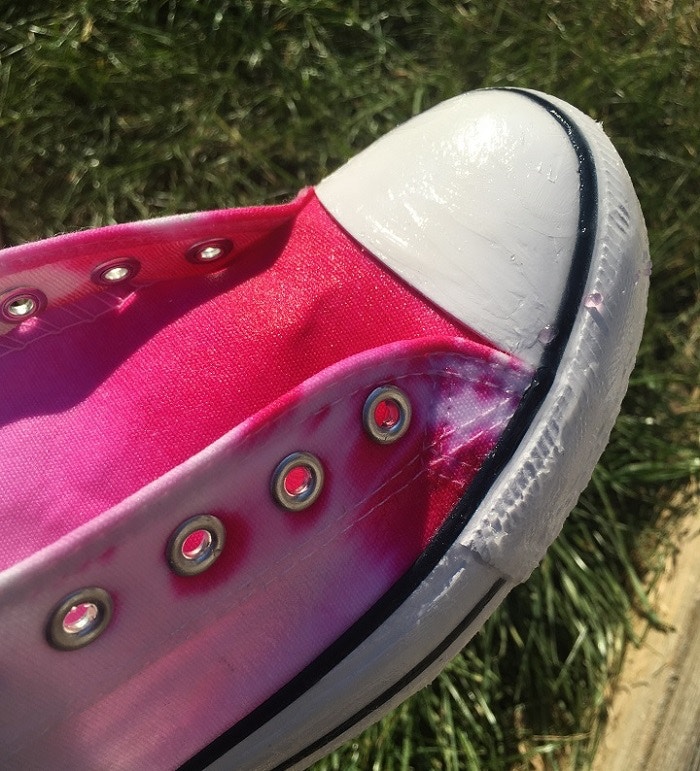
Step Three: How to Ombre Tie Die
Fill a plastic bowl with water and generously apply to the trainer with a brush. Applying the dye directly from the bottle, gently drip the dye onto the fabric, using the brush to manipulate the colour. Apply more to the toe end of the show and drag the colour towards the heel to achieve an ombre look.
Once the pink is complete, take another brush and apply more water to the heel of the shoe. Using a spare plastic container, mix 1/3 of the blue dye with 2/3 of the yellow dye and mix well, to achieve a vibrant green. Paint the dye directly onto the show using a brush, gently adding drops of blue directly to the heel to deepen the shade of green.
Tulip have put together their simple guide for mixing colours, check out the video for mixing multuple colours.

Step Four: It's All in the Detail
Once the shoes are completely dry, it’s time to add the details. We used the Colour Shot in silver to bring a little glitter to our shoe, as well as a combination of the Fabric Markers and Liquitex Paint Pens to achieve our desired pattern.
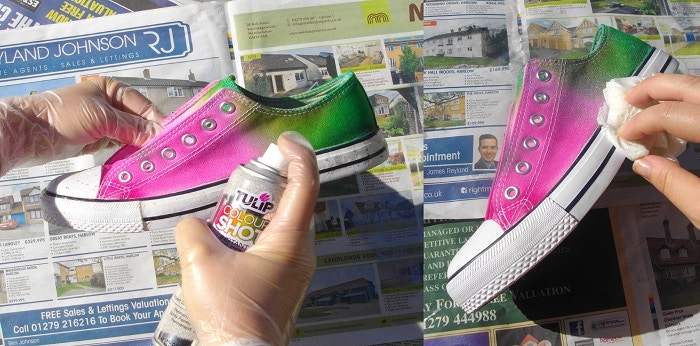
Step Five: Adding a Little Sparkle
Place sheets of newspaper on the ground and position the shoe on an angle to expose its full side. Shake the can well to ensure the colour is well mixed and spray several inches away from the show. The nib allows for controlled application. The harder you apply pressure, the stronger the colour. To achieve a light glitz, pulse the nozzle in short bursts, constantly moving the can to ensure a light application of colour.
Once finished, you can now remove the Vaseline from the sole.

Step Six: Add the Pips and Perfect Imperfections
Using the black fabric marker, start to apply the pips randomly over the tongue and sides of the shoe. Start by drawing small circles and with the tips pointing towards the heel.
Throughout the dye process, there are bound to be some imperfections. Use the Green and Pink Fabric Marker to fill in any gaps where the dye didn’t take. If any dye or silver glitter remains on the sole after the Vaseline is removed, simply use a Liquitex Paint Marker to discreetly restore the lines back to black.
Step Seven: Final Touches
Now that you design is almost complete, it’s time to add the laces back in and polish up the sole. We went for a straight line lace, so that the design has more room to show through in between the laces.
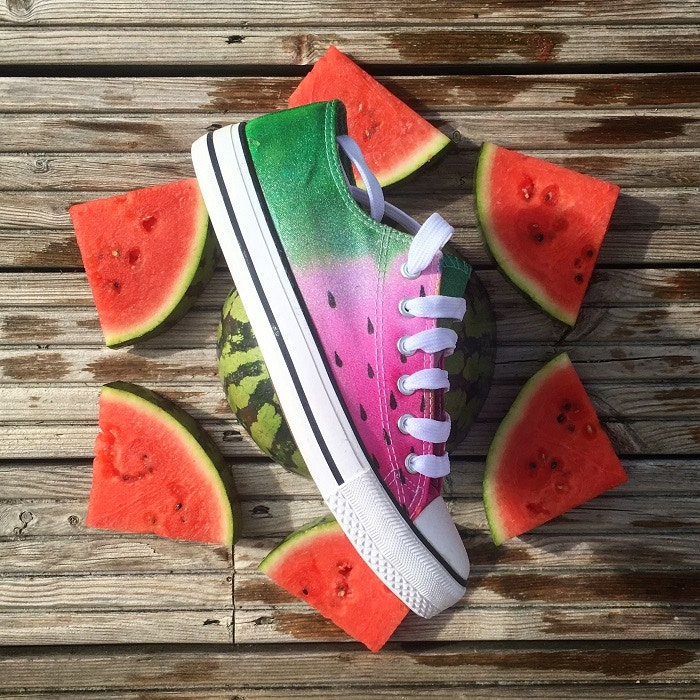
And hey presto! Your Watermelon inspired-shoe is now ready for the catwalk.
Feeling Inspired?
Shop the full range of Tulip products on our website and start customising your own clothes.

