Looking for an easy (and rather satisfying) craft project? Or wanting to add a pop of colour to your sock drawer? Stumped for a unique gift for that person who has everything?
I’ve got a step-by-step guide using RIT dyes to get you tie-dying like a pro in no time - I mean who doesn’t love tie-dye socks!
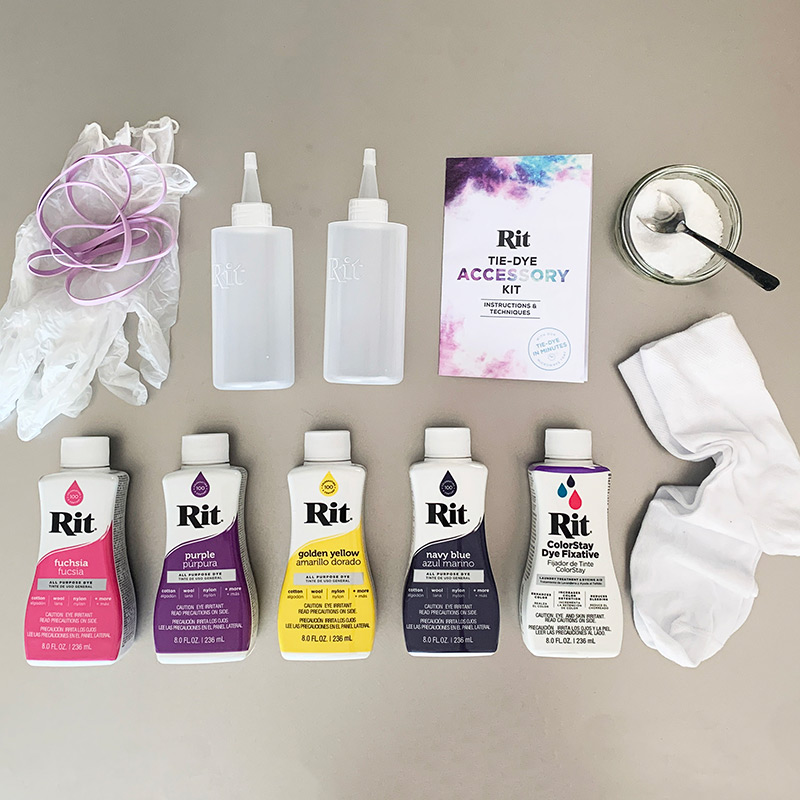
RIT dyes in a few colours - Up to you how many you choose here – I’m using three but you could easily go for more or less
RIT – colourstay fixative – this will set the dye
RIT Rit Tie Dye Accessory Kit – this set is super handy for this project – containing gloves, rubber bands, microwave proof dish, 3 squeeze bottle for dye application
Salt
Metal grid tray
Hot water
Paper towels
Access to a microwave or hairdryer
Socks to dye – they need to be at least 65% cotton and white/light coloured
You might want to wear an apron or old clothes – just in case
Work outside or clear some space in your kitchen, bathroom or utility room. Wear gloves and apron and supervise any children.
STEP 1: PREPARE YOUR SOCKS
Pre-wash your socks, if new, to remove any finishing additives that may interfere with the dyes. Otherwise just dampen them.
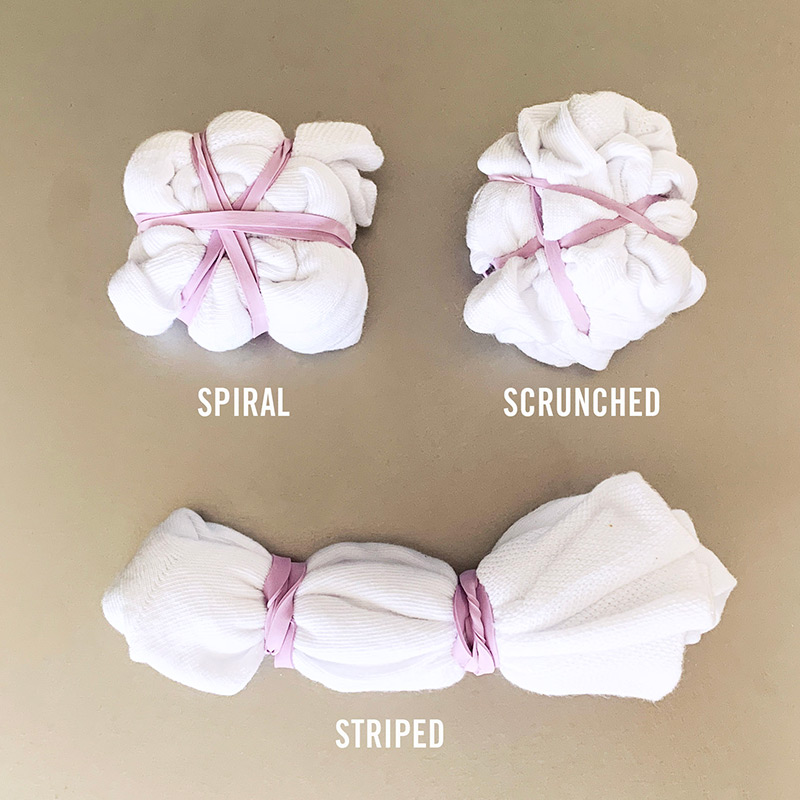
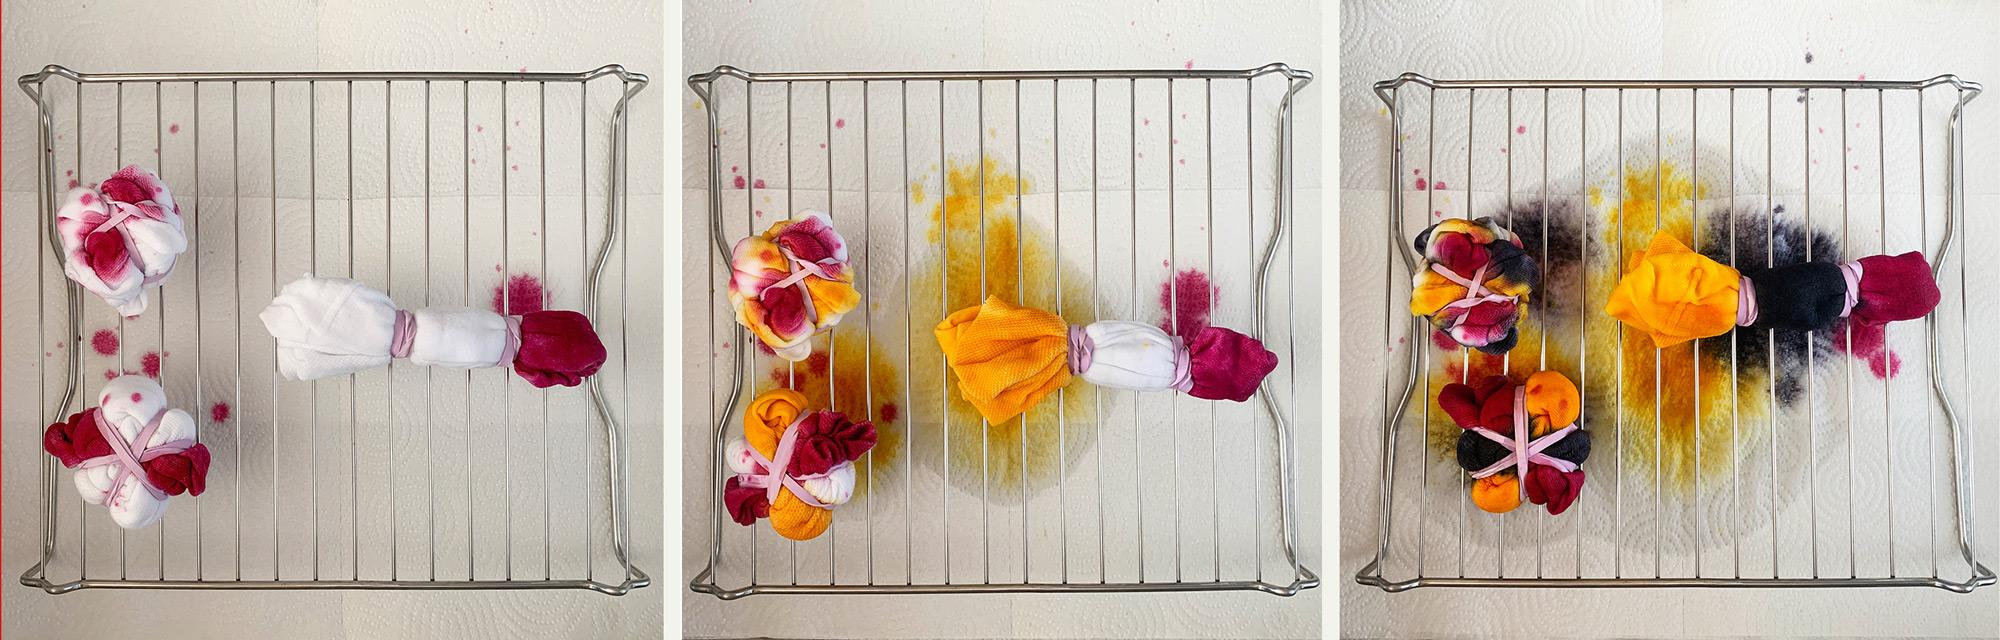
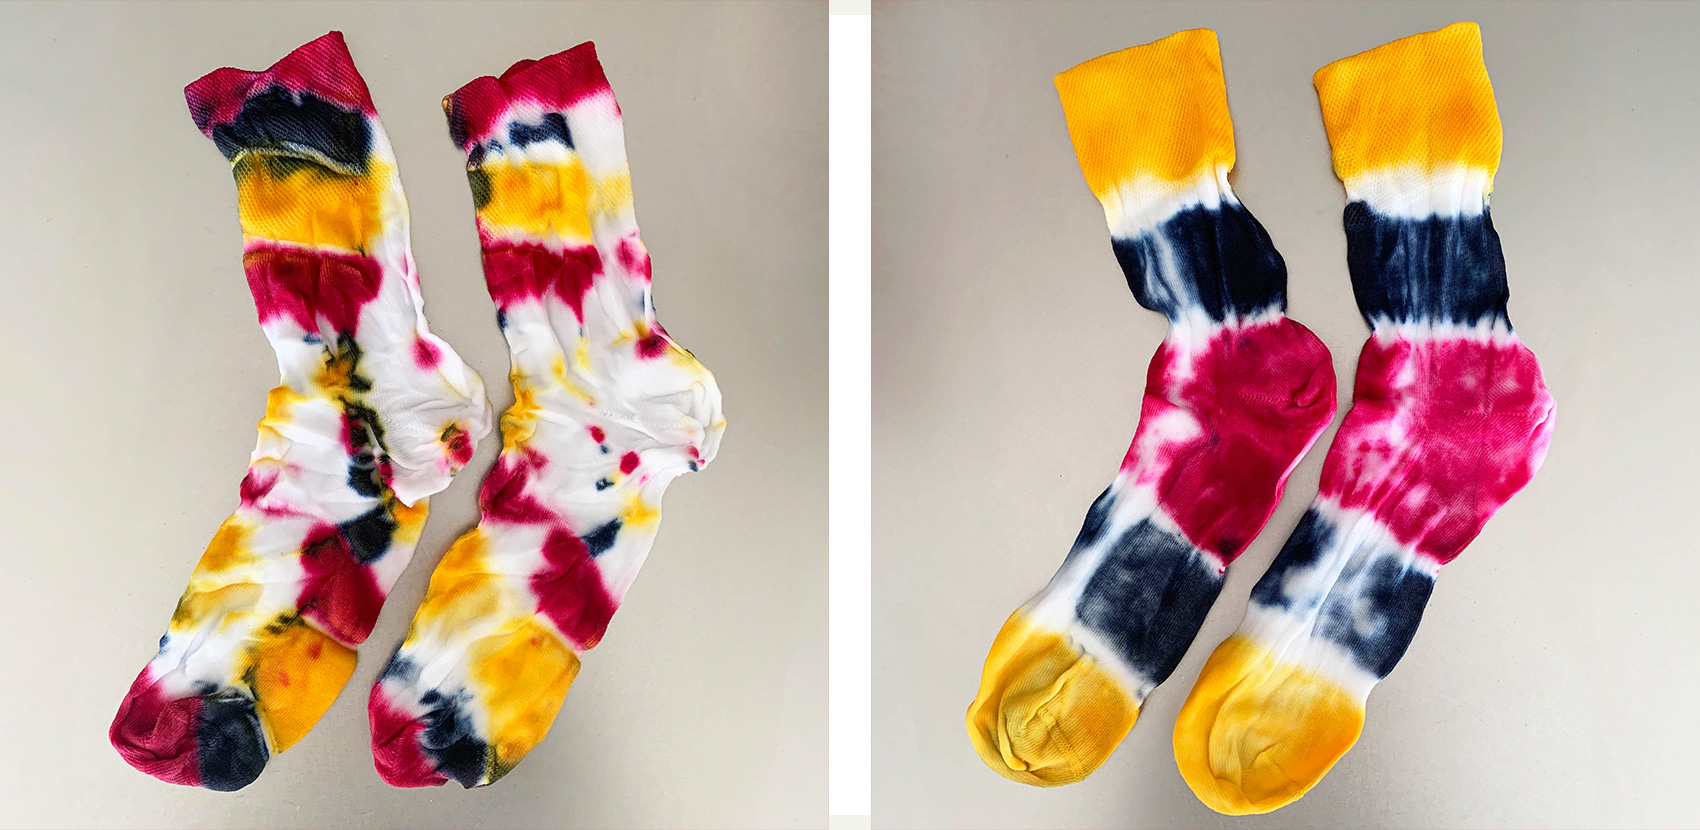
Fold and tie your socks. I’ve used a few classic folding techniques here, plus a couple of extras you’ll discover later on! Since socks don’t have a lot of surface area, the usual techniques you may have use before on t-shirts are a little more challenging. That said, you’ll still get some brilliant unique results
SPIRAL
it’s hard to get a true spiral design with socks being odd shaped. So the results of this folding technique will be slightly random – which I think is good fun.
Lay two socks together. Grab a small section in the heel area, and twist to start rolling up the socks. Keep twisting until the socks are folded up into a tight bundle.
Cross three rubber bands in the middle to create six ‘wedges’ and secure in place
SCRUNCHED
You can’t really go wrong with this design, so do whatever you want with it. You can dye them as a pair, or as single - I’ve done mine as a pair so laid together first
Scrunch and foldup small sections of the fabric together randomly. Keep scrunching and folding, gathering the socks into a relatively flat, tight disk. Wrap around rubber bands to create random shapes and to secure.
STRIPED
Lay two socks together, fold them in half lengthwise and then width wise so the toe is sat with the top.
Place two rubber bands making three sections
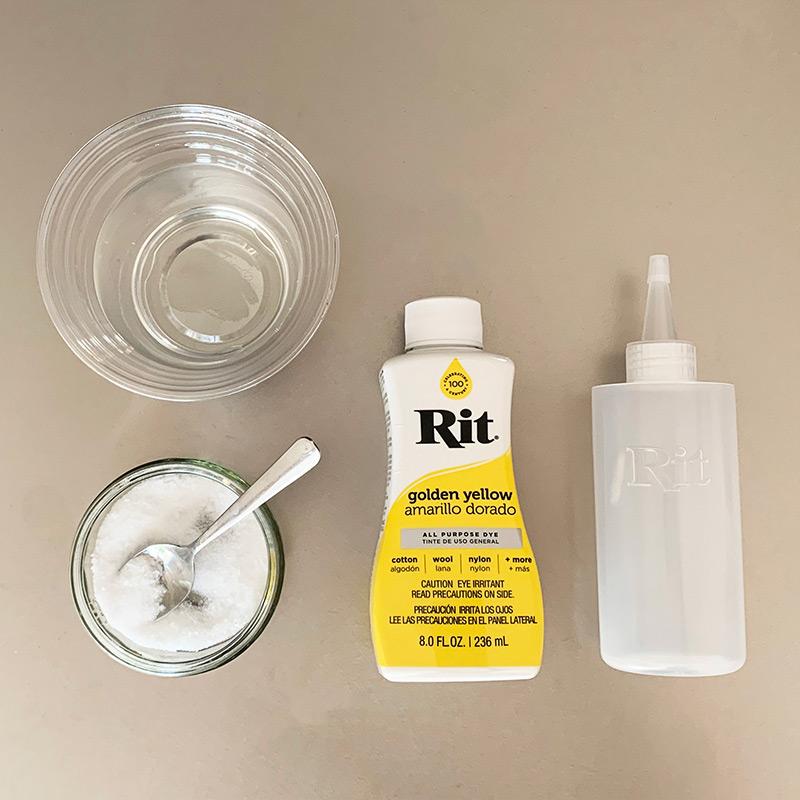
STEP 2: PREPARE YOUR DYES
Add 1tsp of salt and 2 tsp of your dye to one squeeze bottle.
Fill up with hot water and shake to mix. Make sure you cover the end of the nozzle with your finger!
Repeat as necessary for other colours.
The mixture needs to stay warm so if it cools down, re-heat in the microwave briefly.
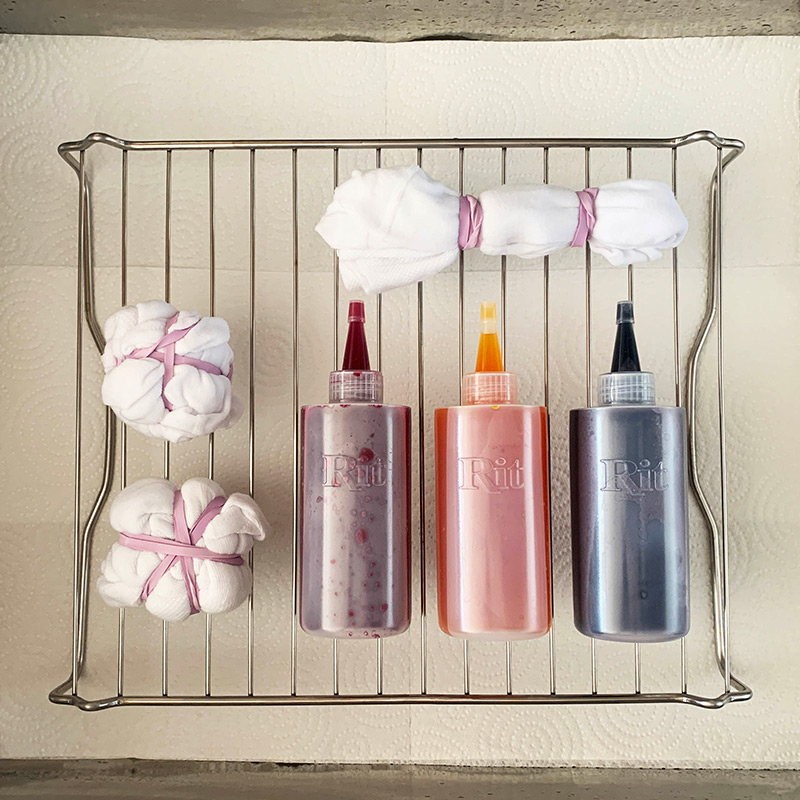
STEP 3: PREPARE YOUR DYING AREA
Grab an oven grill tray or something that will suspend the socks whilst dying and allow the dye to drip through.
Place it on paper towels (or an old towel/dust sheet) to protect your surface underneath. I’ve placed mine in the sink for easy cleaning up!
You should now have your tied up socks and dyes all ready.
Get your gloves on to avoid tie-dyed hands!
STEP 4: START ADDING COLOUR
Use one colour at a time to apply the colour to the sections or go random. I found this part quite therapeutic, and the colours were lovely and vibrant. I had a few spills where colours went where they were intended (which didn’t sit well with the controlled part of me!) but that’s all part of process and once you embrace it, it’s all good :)
To get into the folds as best as possible use the nozzles to help distribute the dye throughout the whole sock.
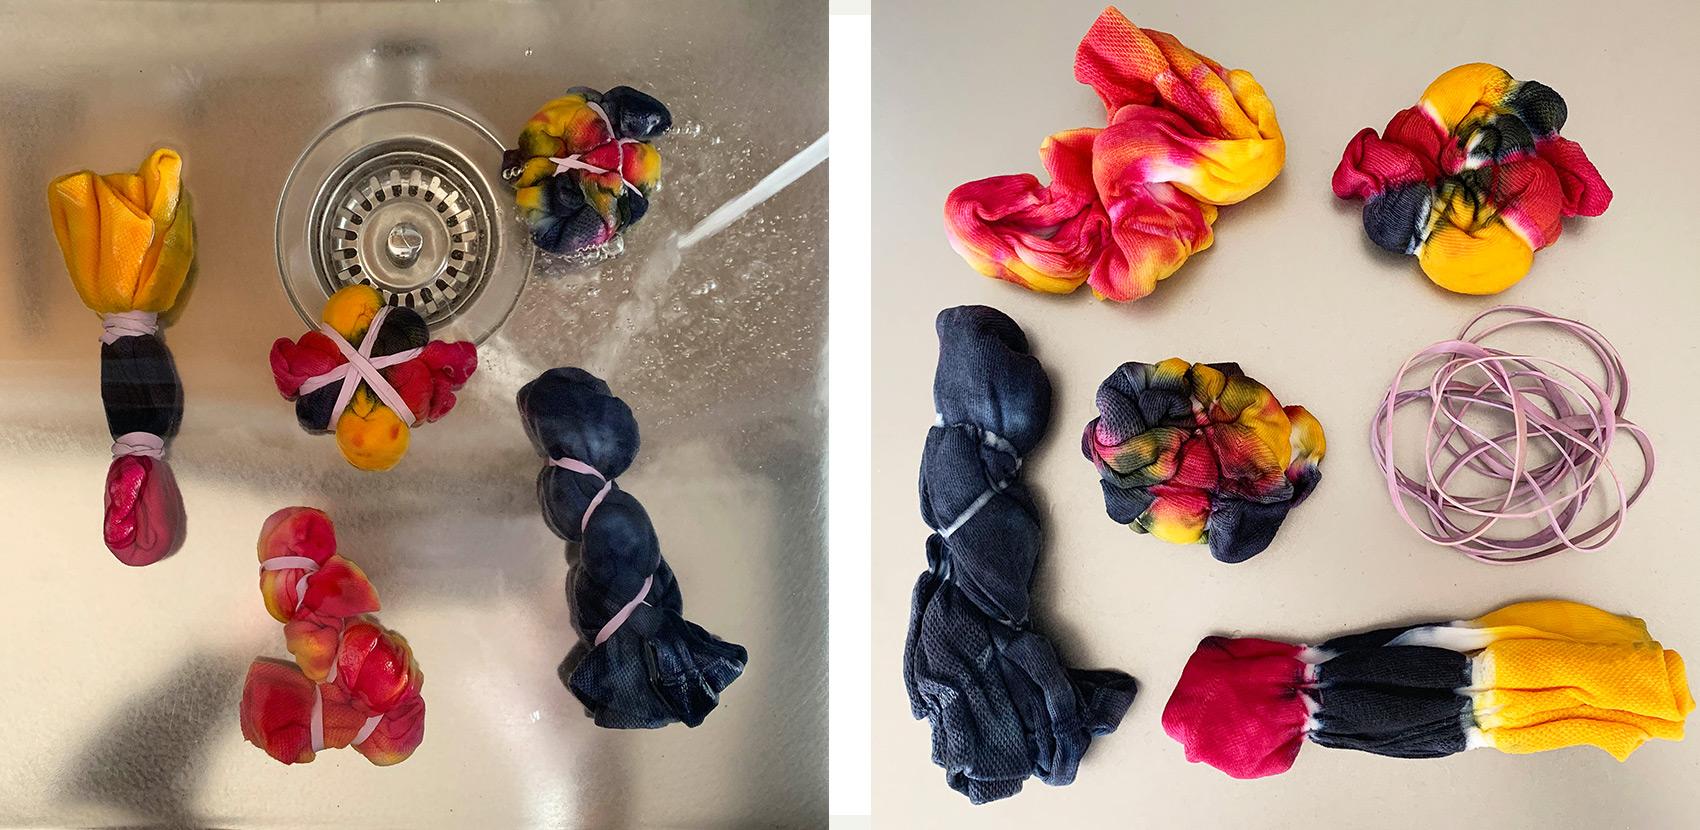
RANDOM EXTRAS
At this stage I realised I had a lot of dye left over and two extra pairs of socks so I whipped up a couple of random ties, where I bunched up and tied to create a kind of zig-zag effect.
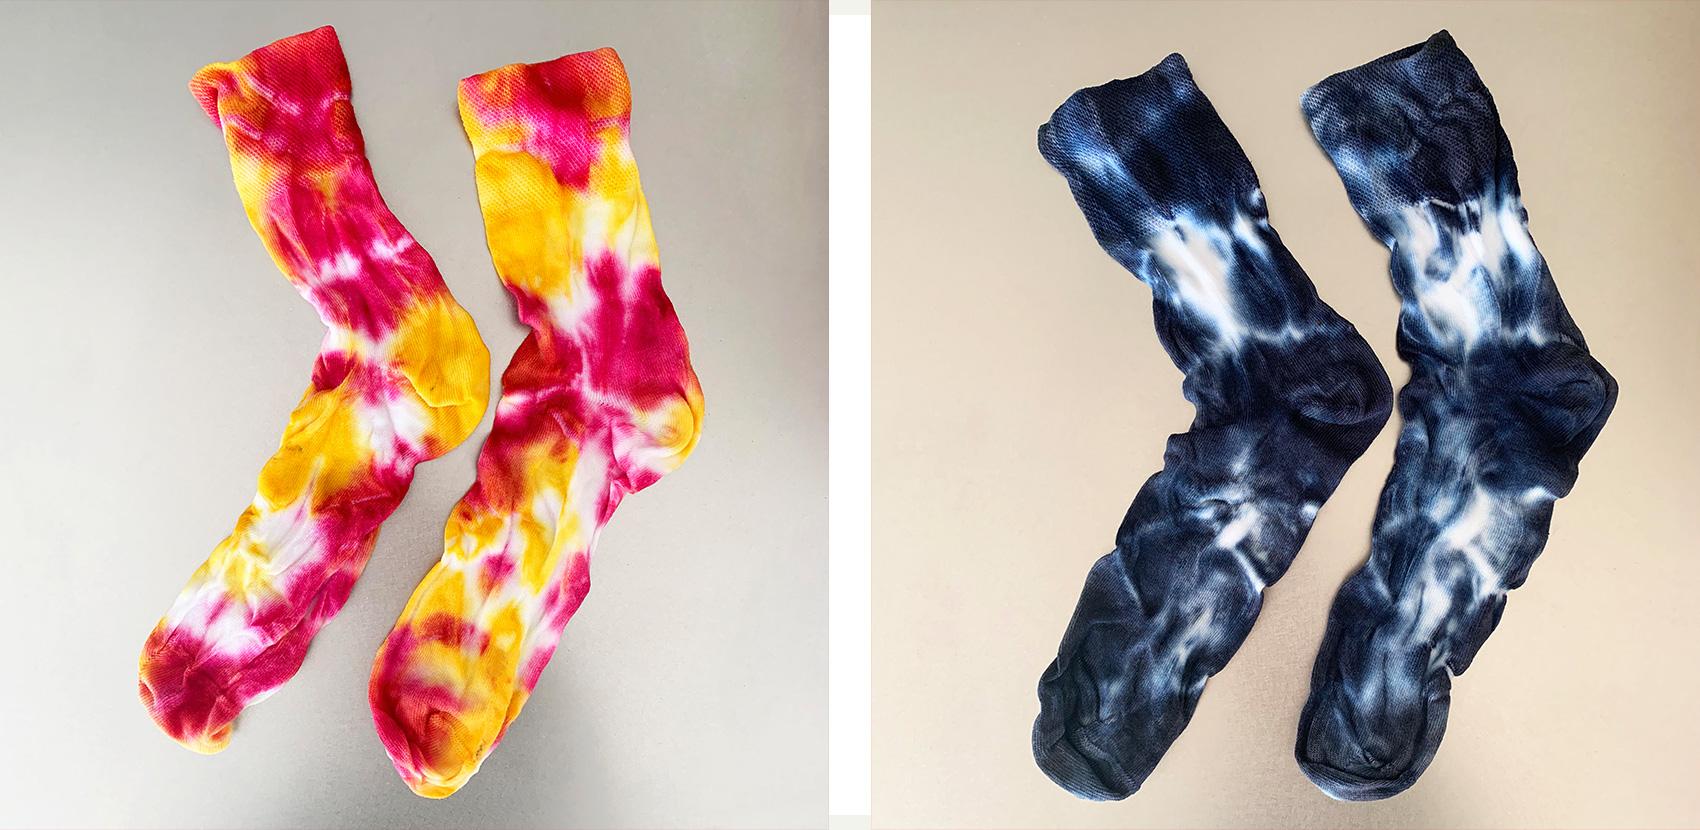
Applying the dye in mono (navy) and duo (pink and yellow) designs for a different aesthetic.
You’ll now need to wait for at least 30mins for the dye to do it’s work.
STEP 5: PREPARE AND APPLY YOUR FIXATIVE
Add 2 Tbps of fixative to a clean squeeze bottle and top up with hot water.
Apply liberally to both sides of the socks
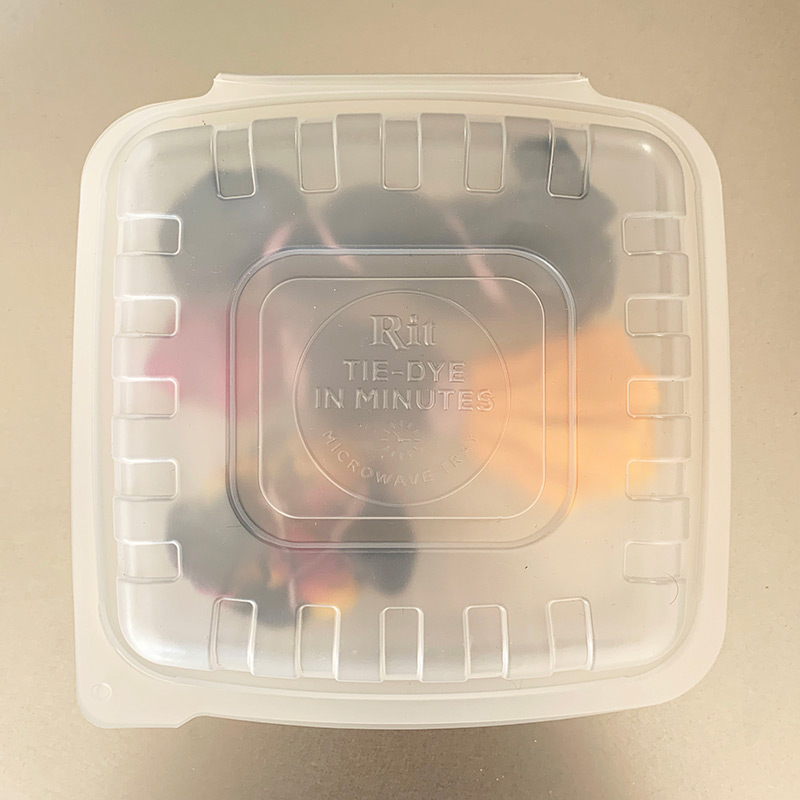
STEP 6: HEAT SET THE COLOUR
Put your socks in the microwave proof container and heat for 2mins. Leave for 5 mins after before opening the lid – leave to cool so you can handle.
It’s best to heat set each item separately here, I made the mistake of doing more than one and some of the colours ran into each other. So, I recommend doing one at a time
If your fabric contains metal then use a hairdryer instead or leave in the hot sun if you’re lucky enough to have the weather!
STEP 7: RINSE AND UNRAVEL
Once cool enough to handle, run under cold water until the water is clear.
Then carefully remove the rubber bands and unravel.
WAH-LAH! REVEAL THE UNIQUE DESIGNS!
Wash separately in mild detergent for the first time. Then they’re ready to wear or gift!