
Creative Calligraphy Valentine's Day Cards
Posted by Cass Art Student Ambassador on 18th Aug 2021
Valentine’s Day is round the corner and our Cass Art Student Ambassador Samantha Ibarra is sharing her Calligraphy expertise in this quick and easy Valentine’s Day Card demonstration.
What you need:
- Anita’s A6 Quality White Cards 240gsm – the thickness of this card is perfect for the calligraphy inks
- Black Indian, Scarlet and Gold Winsor and Newton Inks
- A selection on Calligraphy nibs from the Italic and Poster Calligraphy Set. I used tape nibs in the sizes 1mm, 2mm, 2 1/2mm and the 4mm Poster nib.
- A Calligraphy Dip Pen
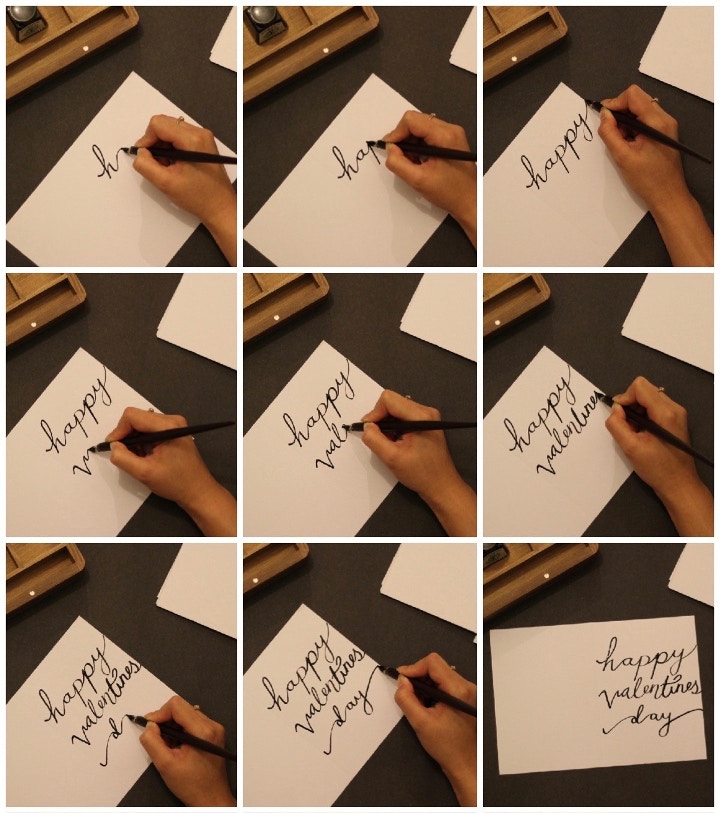
Card One – Free Flow Calligraphy
This first design is a free flow calligraphy style- you can never go wrong with this style because you can form the letters however you want.
- Step 1: Take a 1mm tape nib and a black Winsor and Newton ink
- Step 2: Drag the ink from the edge of the card to begin writing and remember to keep the pen on the paper until the word is complete. Placing the card at an angle makes it easier to write on the same line. Make sure the nib has plenty of ink to keep the flow. You wouldn’t want to lift your pen in the middle of the word to dip for more ink.
- Step 3: Fill in any hard edges where the ink might have ran out to give the letters a full look.
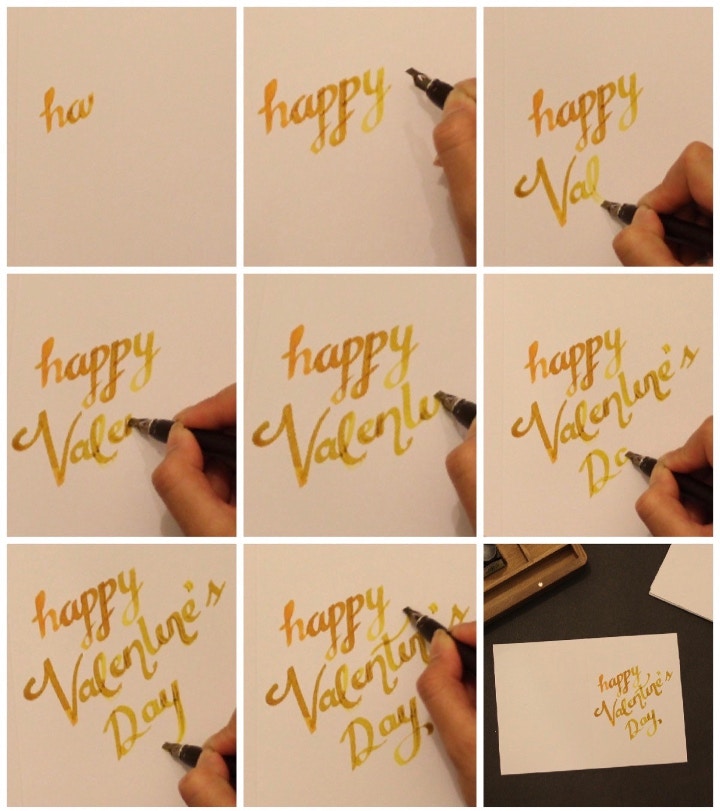
Card Two - Loopy Lover Calligraphy
This second style can be a little bit trickier because you have to keep the pen nib at the same angle all the way through. But, it does come out great after some practice!
- Step 1: Take a 2 ½ mm tape nib and an Ecoline 259 ink
- Step 2: Dip the nib into the gold ink.
- Step 3: Tilt the card at a comfortable angle and start by writing the first word at a 45 degree angle.
- Step 4: Continue writing the rest of the greeting ensuring that all loops at the bottom of the letters ends in the same direction. Don’t forget to keep dipping the ink before it runs out and ensure that you keep the same angle of the pen for consistency of the letter style.
- Step 5: Put it to the side and let it dry before writing your message inside the card.
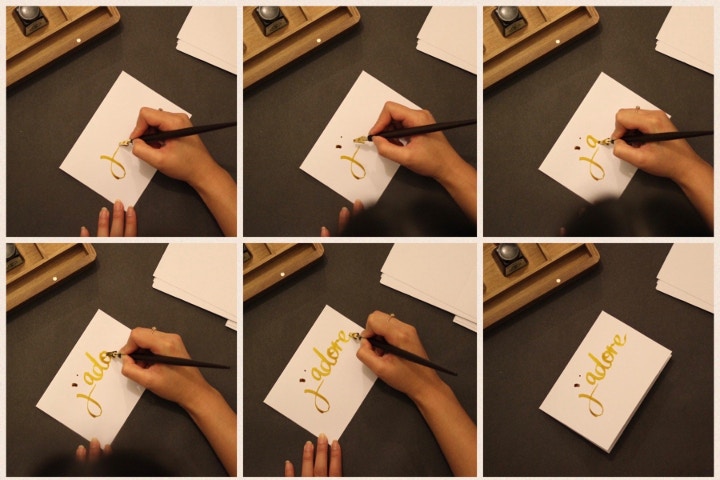
Card Three - Loud and Clear Calligraphy
Here, we experiment with a much thicker pen nib compared to the ones we used before. I’ve chosen to write the word j’adore and since it’s only one word, a thicker nib will emphasise it better.
- Step 1: Take a 4mm poster nib and a Winsor and Newton gold ink
- Step 2: Dip the Poster nib into the ink and begin by writing a “j” with a loop.
- Step 3: Add the apostrophe next to the letter and keep the pen in the same angle throughout.
- Step 4: Leave a small gap before adding the letter “a"
- Step 5: Connect the other letters to complete the word. It doesn’t have to be straight and boring, writing the letters higher or lower than the letter before makes it more exciting!
- Step 6: Leave the card to dry and go back to work on the letters if you want to darken specific areas.
I hope you enjoyed this tutorial on how to make your own Valentine’s Day cards using calligraphy techniques. Spread the love this Valentine’s and feel free to share these cards to your loved ones!
Feeling Inspired?
Find out more about the Winsor and Newton William and Henry Collection

